Connect an application
To allow your scenario to get and receive data from third-party services, you need to create a connection between Make and those services.
Connections allow your scenarios to perform actions like updating records in Airtable, sending emails in Gmail, adding rows in Google Sheets, and many more, from directly within your automated workflow in Make.
Since third-party services use different technologies and authentication methods, the steps to create a connection in Make can vary.
For some apps, you will only need to log in to the third-party service and grant Make permission to access your profile and data. Other apps may require you to enter specific credentials such as username and password, API Key, Client ID, and Client secret, or other values.
To prevent connection errors, always review the app's required connection details in our Apps Documentation.
Make offers two types of connections:
- Standard connections - the most common type of connection, covered in detail in this article.
- Dynamic connections - a variable that contains multiple connections you can choose from while executing the scenario. Learn more about this Enterprise-level feature here.
If Make doesn't offer an integration for the service you need, you can connect to it using the HTTP app.
Create a connection
You create connections in the Scenario Builder when adding a module. All users in your team in Make can use and manage any connections you create in that team. Use your personal third-party account and credentials carefully, especially when your team has otherusers.
If you're on the Teams plan or higher, you may consider creating a separate team in which you are the only member to connect to Make using your personal accounts and details.
To see how to connect a specific app, refer to the app's page in the Apps Documentation.
These are the general steps to create a connection:
Create a new scenario or open the existing one.
Click the giant plus and search for the app and module you need. In this example, we will choose Dropbox > Create a Folder.
Click Create a connection.

Steps 4 and 5 can vary. For Dropbox, you will only see the Connection name field within the standard settings. However, for other apps, you may see additional optional and(or) mandatory fields related to authentication or module's requirements.
In the Connection name field, you can name your connection. For example, if you have two different Dropbox accounts, you might name one "Dropbox-Company" and the second "Dropbox-Personal".

Click Save. A new window prompts you to grant Make access to your data.
Follow the on-screen instructions to grant Make access to your Dropbox account and data.
You have now created a connection between your Dropbox account and Make and can continue setting up the module. You can reuse this connection in any other Dropbox module across scenarios.
Within your team, there can be multiple connections for the same app. If a connection already exists, follow these steps to create another one:
- Click Add in the Connection field of the required app's module.
- Repeat the connection creation steps described above.
You can now select the required connection from the drop-down menu in the Connection field.

Manage connections
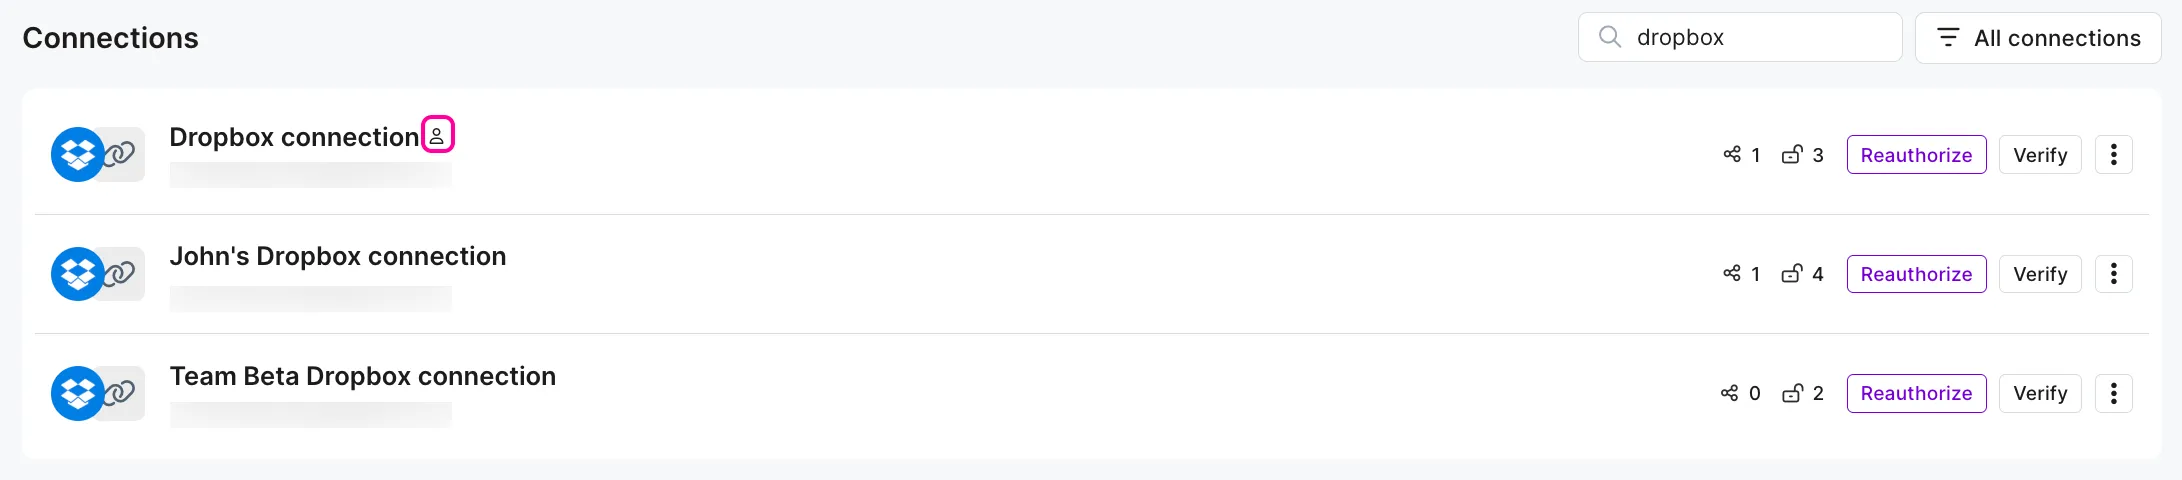
To view and manage connections, click Credentials in the left sidebar, switch to Connections, and locate the required app. From there, you can:
- Edit the connection
- Verify the connection
- Reauthorize the connection
- Delete the connection
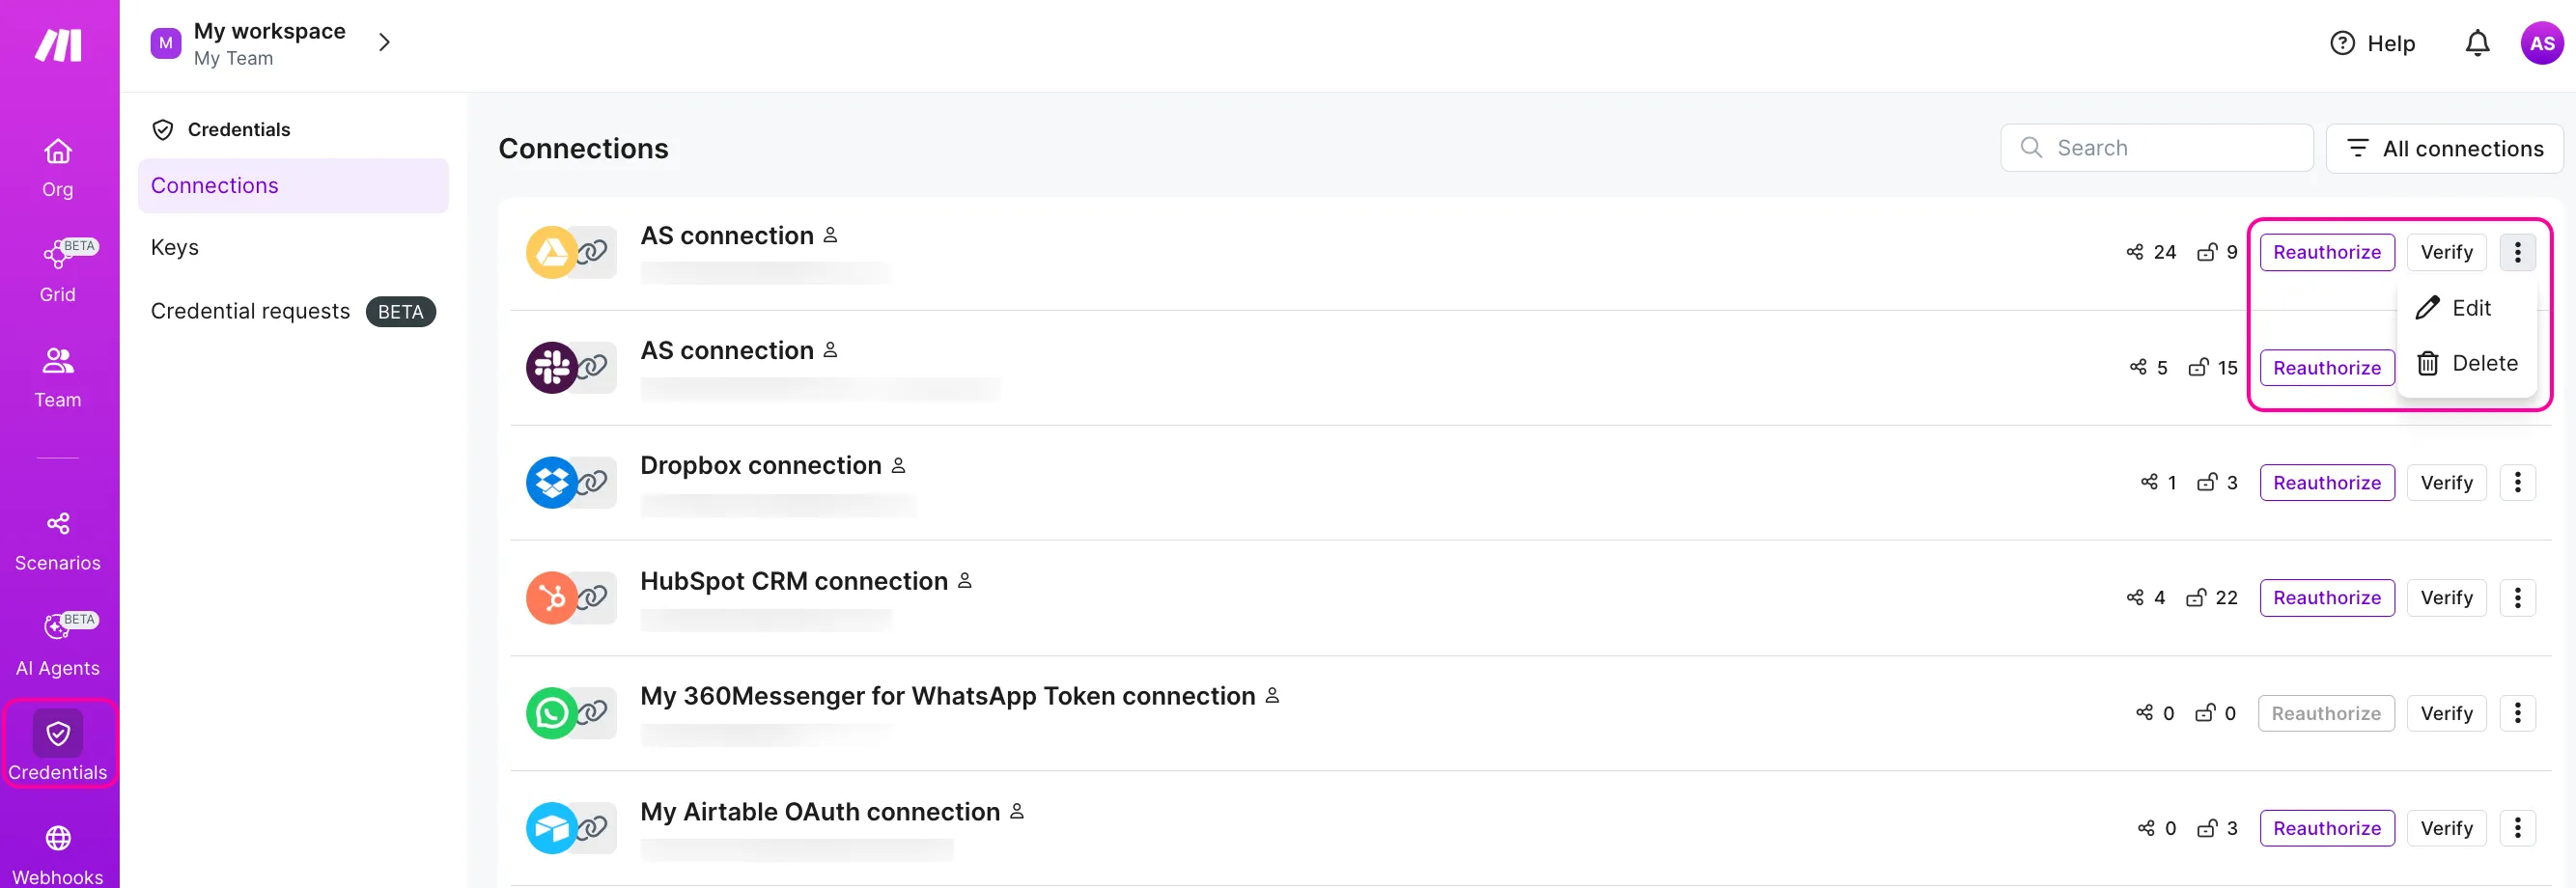
There, you can also see the scenarios where this connection is used, permissions granted and use filter to see your connections.
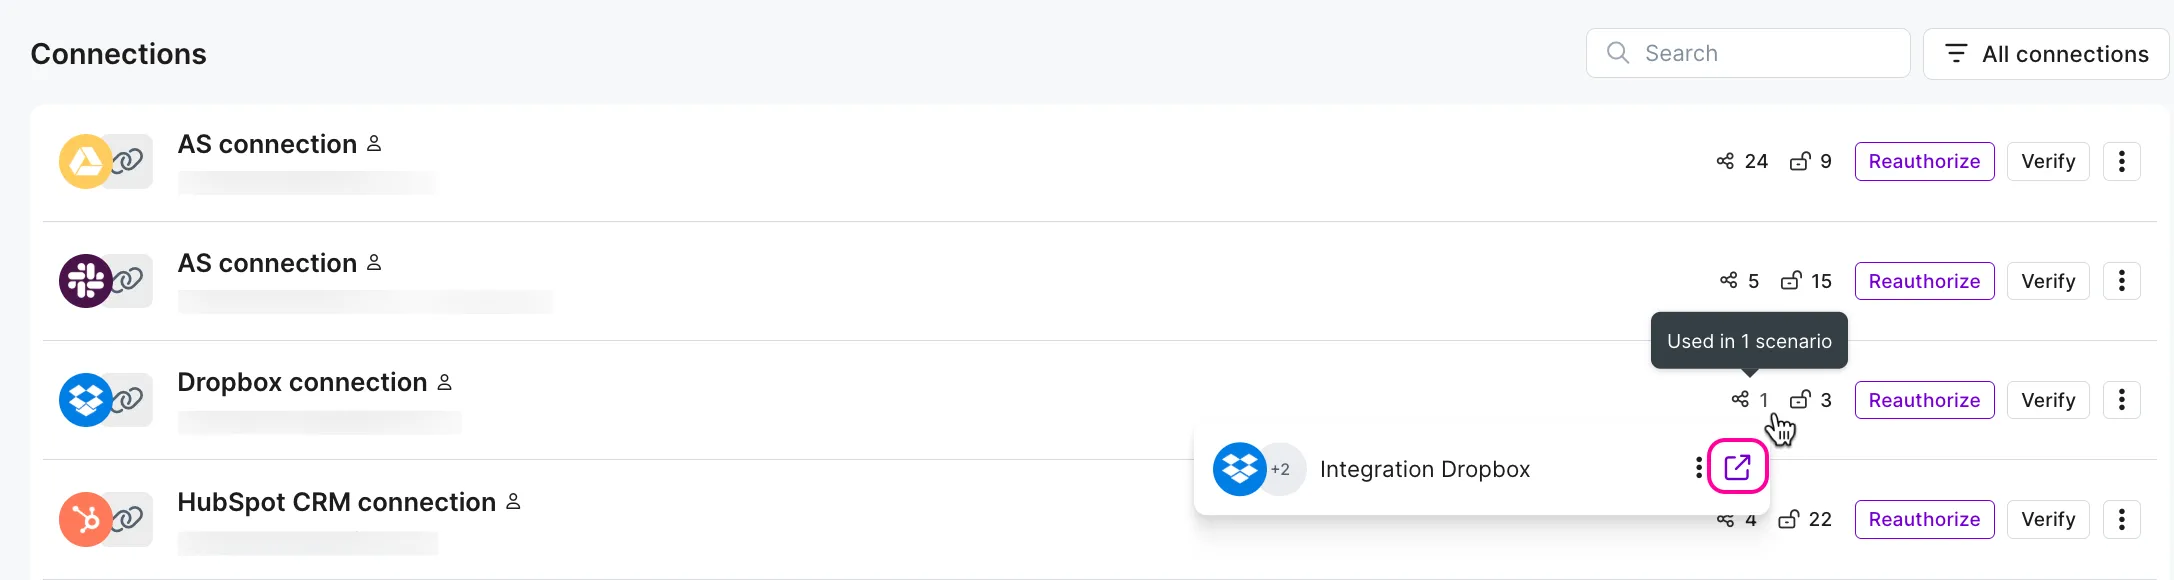
See the scenarios where this connection is used
- Click the scenarios icon to see which scenarios are using the connection, and click the expand icon to open the scenario in a new tab.
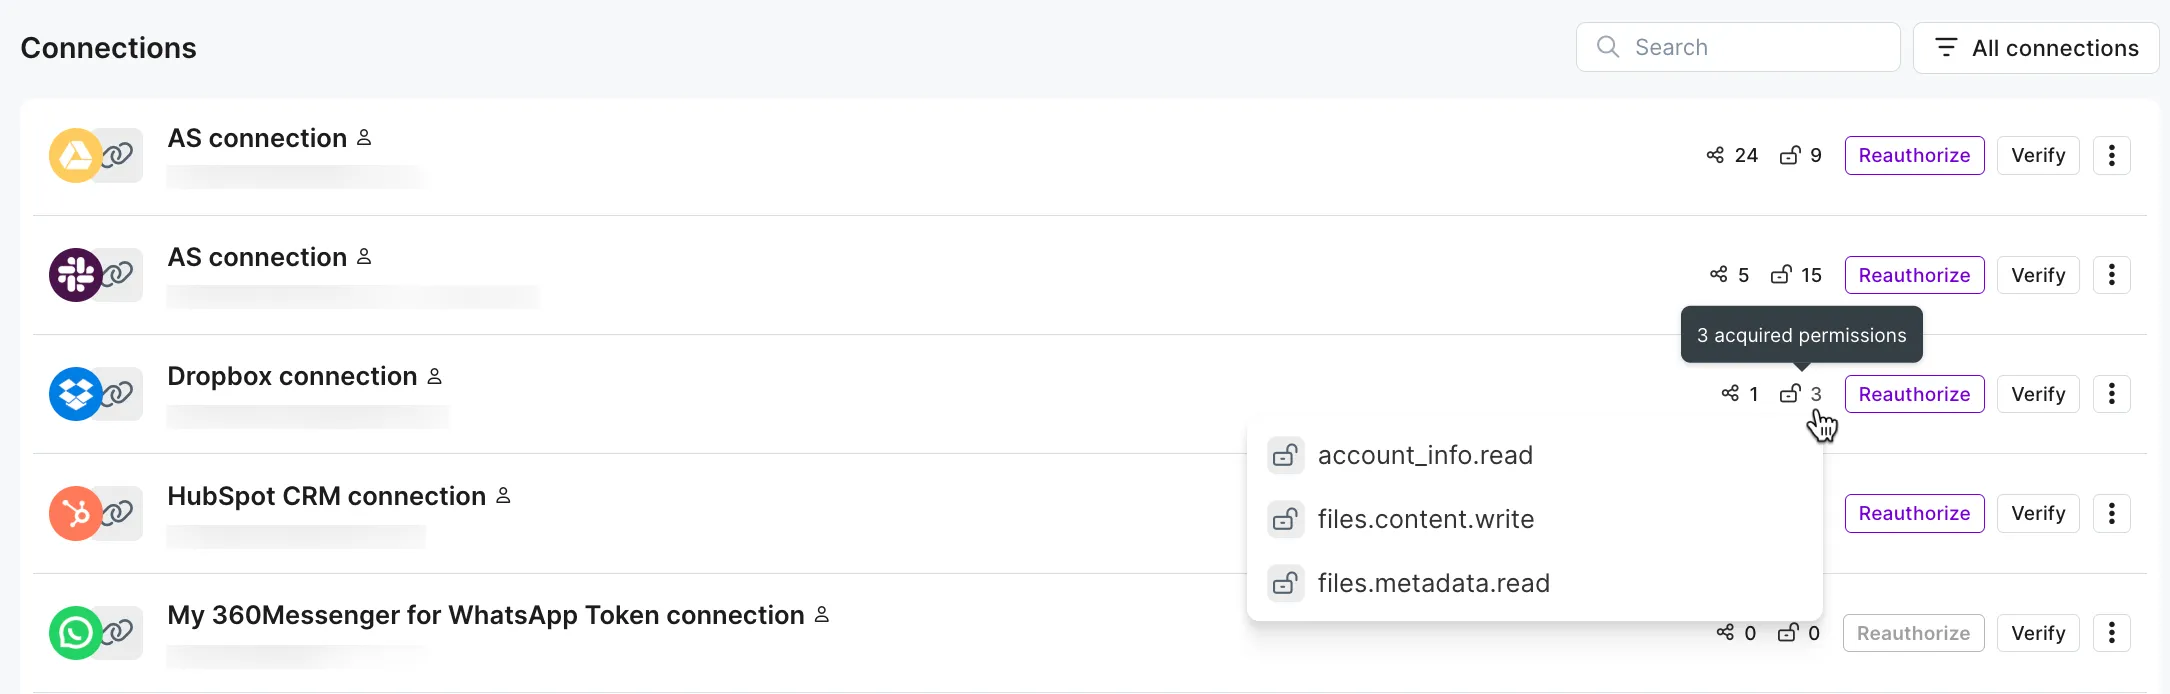
See the permissions granted with this connection
- Click the permissions icon to view the permissions granted for that connection.
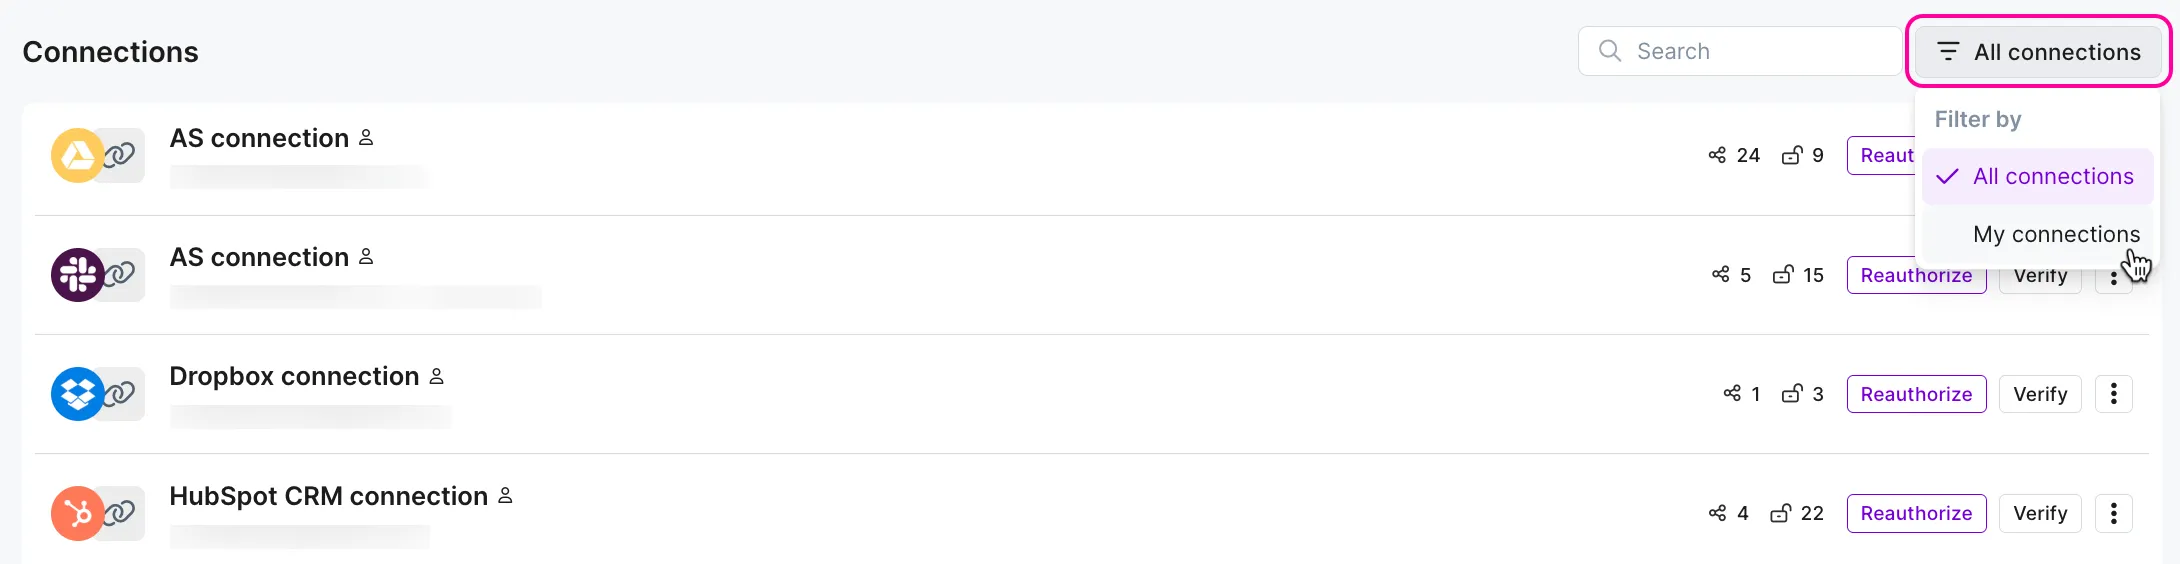
Filter connections
- Click the filter icon next to the search box:
- Select All connections to see all the connections created within your team
- Select My connections to only see connections created by you
- You can also see an icon next to the connection created by you:
Edit connections
You can update the credentials and other details of a connection after you created it. For example, if you need to change the API key, Client ID, Client Secret, required scopes, etc. Different apps will have different connection editing forms depending on the credentials or details they require and allow to edit.
Editing a connection replaces the original data with the new data. You have to provide all the credentials required to create the connection again, as Make doesn't keep the original connection data.
To edit a connection:
In the left sidebar, click Credentials, switch to Connections, and locate the required connection.
Click the three dots > Edit for the required connection.

In the pop-up window, enter the new details.
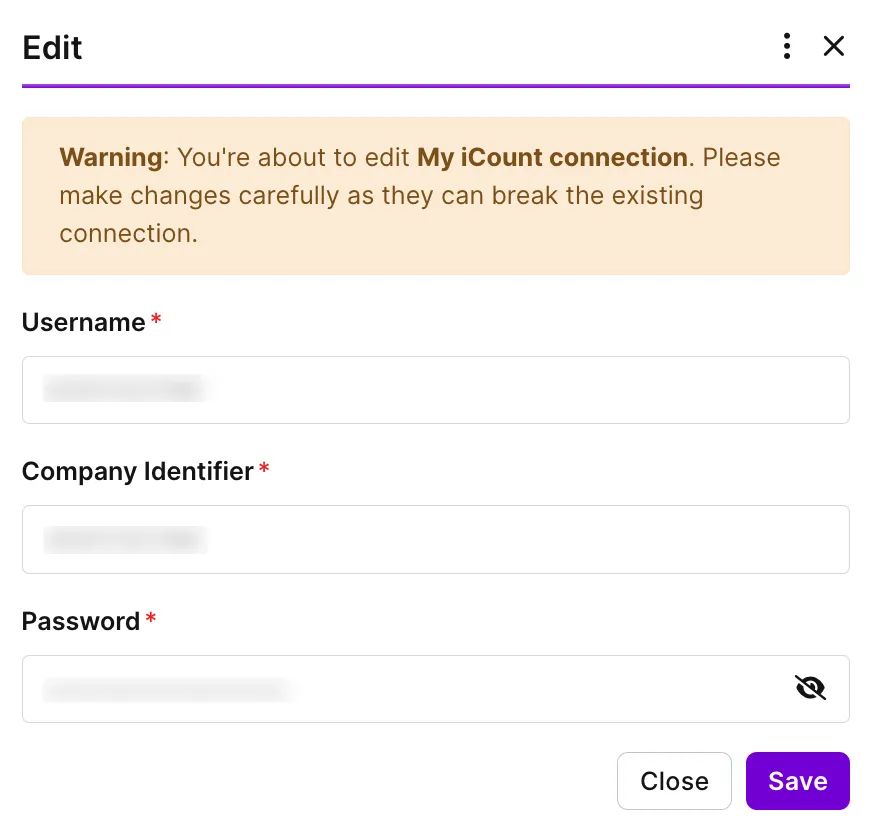
Click Save.
After you edit a connection, it will be automatically updated in all the modules that use it. By editing a connection, you update some of its details, but don't create a new one.
If you've switched accounts used in a connection, or the authentication method has been changed, you will need to create a new connection. Once you create it, follow the steps described here to replace the old connection with a new one across multiple modules.
Edit connections with API keys, OAuth credentials, and scopes
When updating credentials, especially for API key and OAuth connections, make sure the new credentials include all necessary scopes to allow Make modules to perform actions on your behalf. This is particularly important if your scenario uses the Make an API call module of the app.
Make cannot ensure that the edited connection has the scopes required for all modules that use the connection.
If a module uses a connection with insufficient scopes, the scenario will end with an error.
To edit a connection with an API key:
Click the three dots > Edit for the required connection.
In the pop-up window, fill in the new data in the form.
Connection editing forms may vary depending on the app and on the type of credentials you can edit. This is an example for the OpenAI (ChatGPT, Sora, DALL-E, Whisper) connection:

Click the Save button to confirm changes. If you click the Close button, Make closes the form and keeps your original connection.
Make applies the saved changes immediately. After confirming, Make will update the connection details in all the modules where it's used.
To edit a connection with OAuth credentials:
Click the three dots > Edit for the required connection.
In the pop-up window, fill in the new data in the form.
Connection editing forms may vary depending on the app and on the type of credentials you can edit. This is an example of the Airtable connection:

Click the Save button to confirm changes. If you click the Close button, Make closes the form and keeps your original connection.
Follow the steps to confirm that Make can access your account. Check the required fields to create the connection and review the connection scopes. If everything is correct, confirm the connection update with the Accept button.
Make applies the saved changes immediately. After confirming, Make will update the connection details in all the modules where it's used.
Verify connections
To check whether your connection works properly, you can verify it.
To do that:
In the left sidebar, click Credentials, switch to Connections, and locate the required connection.
Click Verify. The button briefly changes to Verifying ... as Make checks.
Once the verification is completed, a green check mark appears.

If the verification fails, you'll see an exclamation mark. This means that something is wrong with the connection. To fix that, click Reauthorize to update access to a third-party service. If it doesn't help, create a new connection.

Reauthorize connections
Apps that use the OAuth 2.0 protocol only grant access for a limited time. In this case, you may need to reauthorize your connection periodically.
To reauthorize the OAuth 2.0 connection:
In the left sidebar, click Credentials, switch to Connections, and locate the required connection.
Click Reauthorize and follow any on-screen prompts that appear.
Once the reauthorization is completed, a green check mark appears.

If the reauthorization fails, you'll see an exclamation mark. This can happen when your browser blocks the reauthorization pop-up, tokens have expired or been revoked, permissions changed, or there was a temporary outage. Try reauthorizing again. If it doesn't help, delete the old connection and create a new one.
Delete connections
To delete a connection:
In the left sidebar, click Credentials, switch to Connections, and locate the required connection.
Click the three dots > Delete for the connection you want to delete.

In a pop-up window, click Delete to confirm.
If the connection is used in any scenario, you'll see a corresponding warning and a list of scenarios where it's used. Click OK to confirm the deletion.
- Deleting a connection may cause your scenarios to stop working. Be sure that the connection is not used in any scheduled or active scenarios.
- If there's a webhook using the connection, you must first delete the webhook before you can delete the connection.
See also
This article covers the basics. To learn about advanced connection concepts and configurations, see the Connections section in Explore more.