Connect to any web service using OAuth 2.0
To connect certain web services to Make, you need to establish an OAuth 2.0 connection.
OAuth 2.0 (Open Authorization) is an industry-standard protocol used for granting secure, limited access to a user's data. It allows one web service to access the resources from another one on behalf of the user. It also ensures that the user consents to the access and that the client service only performs specific, allowed actions.
To establish the OAuth 2.0 connection, you must obtain client credentials from the service you want to connect to. These credentials are commonly called Client ID and Client Secret, though they may have different names. They authenticate your app to the authorization server. To obtain those credentials, you'd usually create an app within the service or app you want to connect to.
In an OAuth 2.0 connection, you also need to specify scopes. They define the level of access your web service requests and control what the connected app can do. For example, you may allow the app to read files, but not delete them.
Example: Connect Make to Dropbox
Dropbox is a cloud storage service that uses the standardized OAuth 2.0 protocol for authorization. Thus, to connect Make to Dropbox using OAuth 2.0 authorization, you'll need to:
Obtain client credentials and scopes
To obtain the client credentials in Dropbox, you need to create an application. There, you will get the App key (Client ID) and App secret (Client Secret), which are required to establish the OAuth 2.0 connection.
To do that:
Log in to your Dropbox account and go to the Developers page.
Click Create apps.
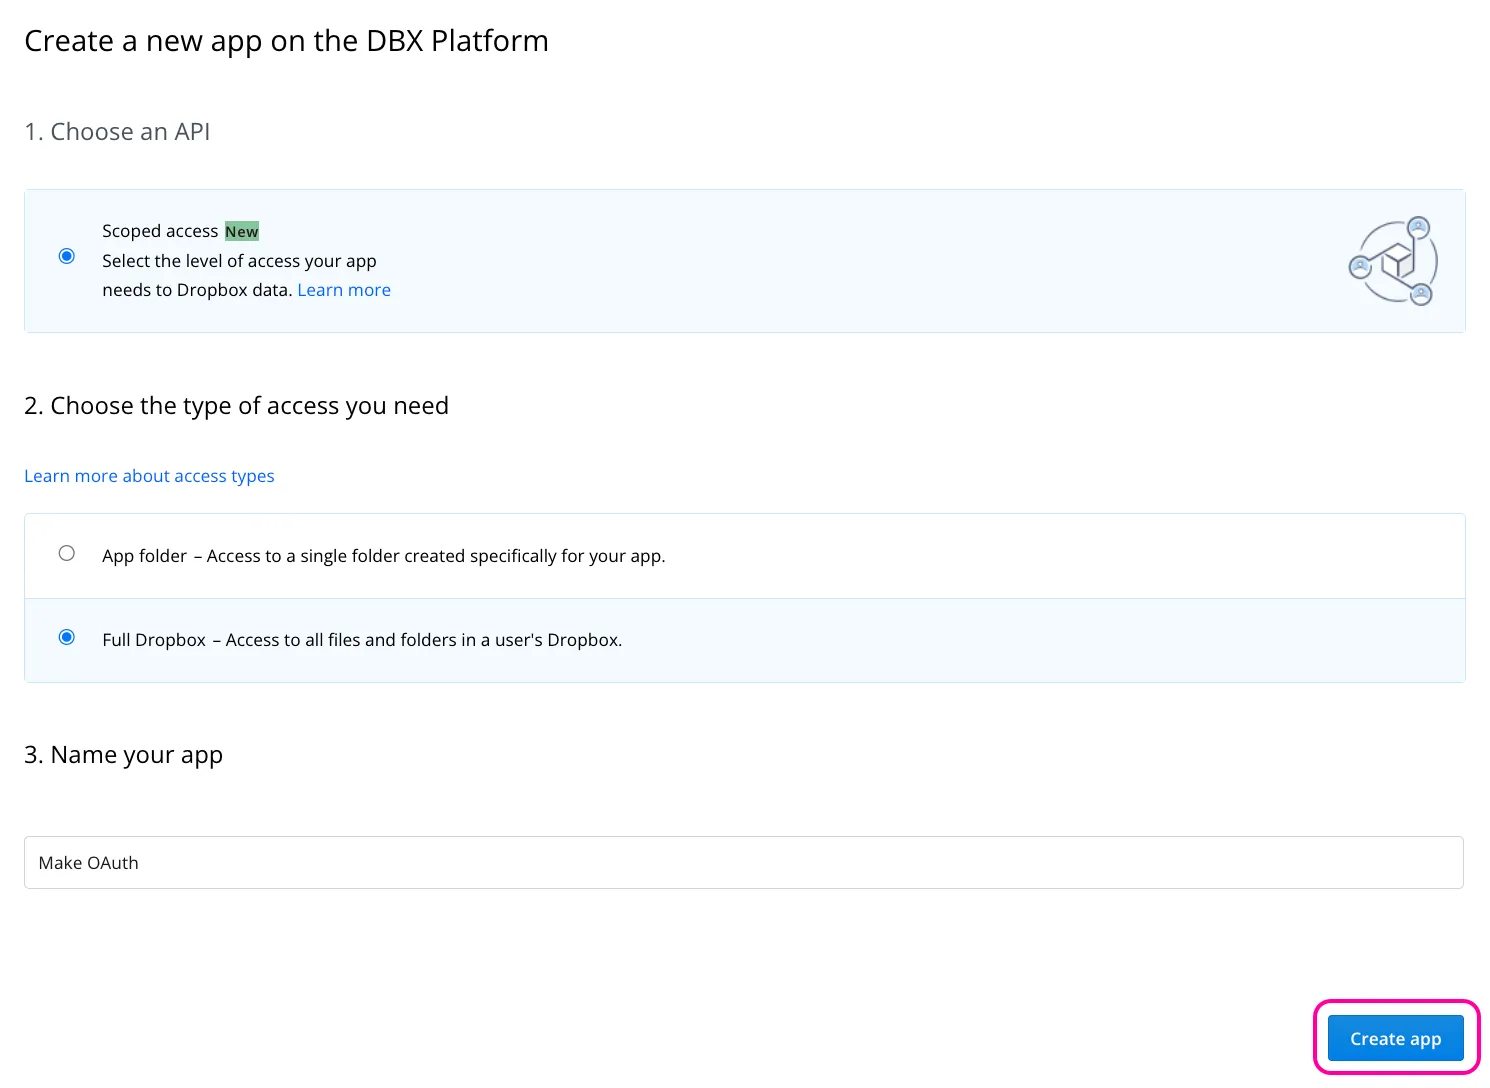
A window to create a new app on the DBX platform will appear. There, you should:
- Select Scoped access under Choose an API.
- Select Full Dropbox under Choose the type of access you need.
- Enter a Name for your app under Name your app.
- Click Create app.
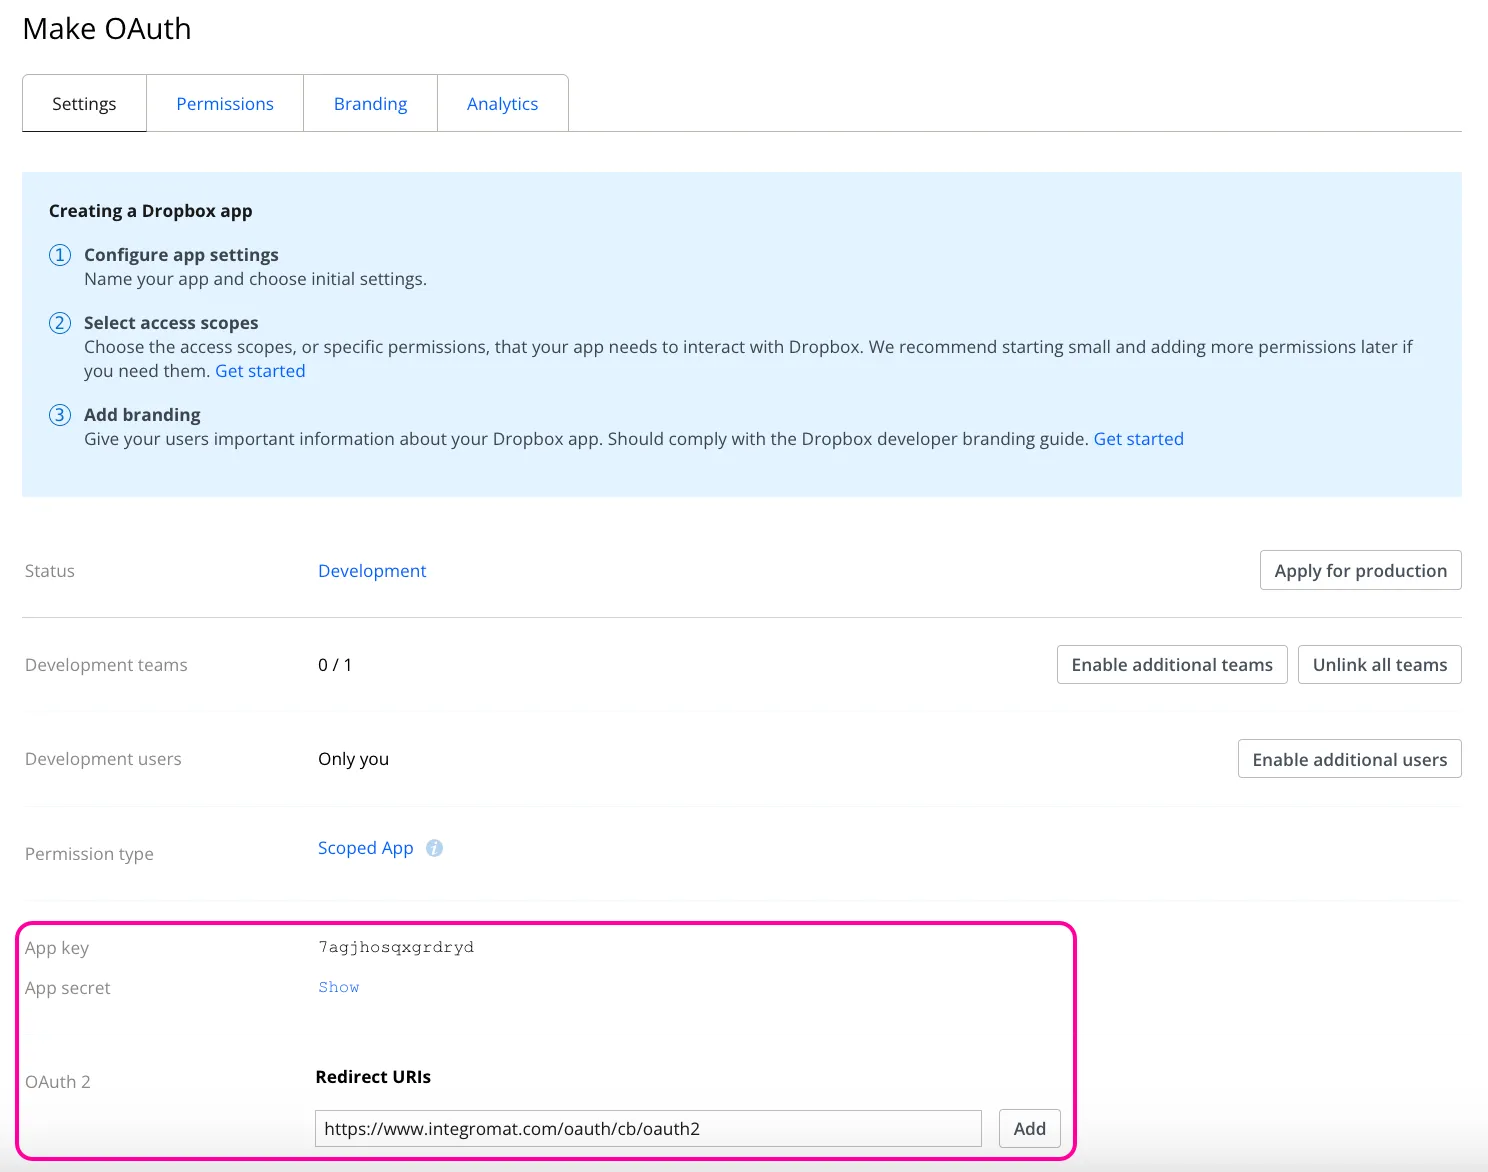
An app configuration window will appear. In the Settings tab, enter https://www.integromat.com/oauth/cb/oauth2 as a Redirect URI and click Add.
Copy the App key (Client ID) and App secret (Client Secret) and store them in a safe place. You will need them later to establish the connection in Make.
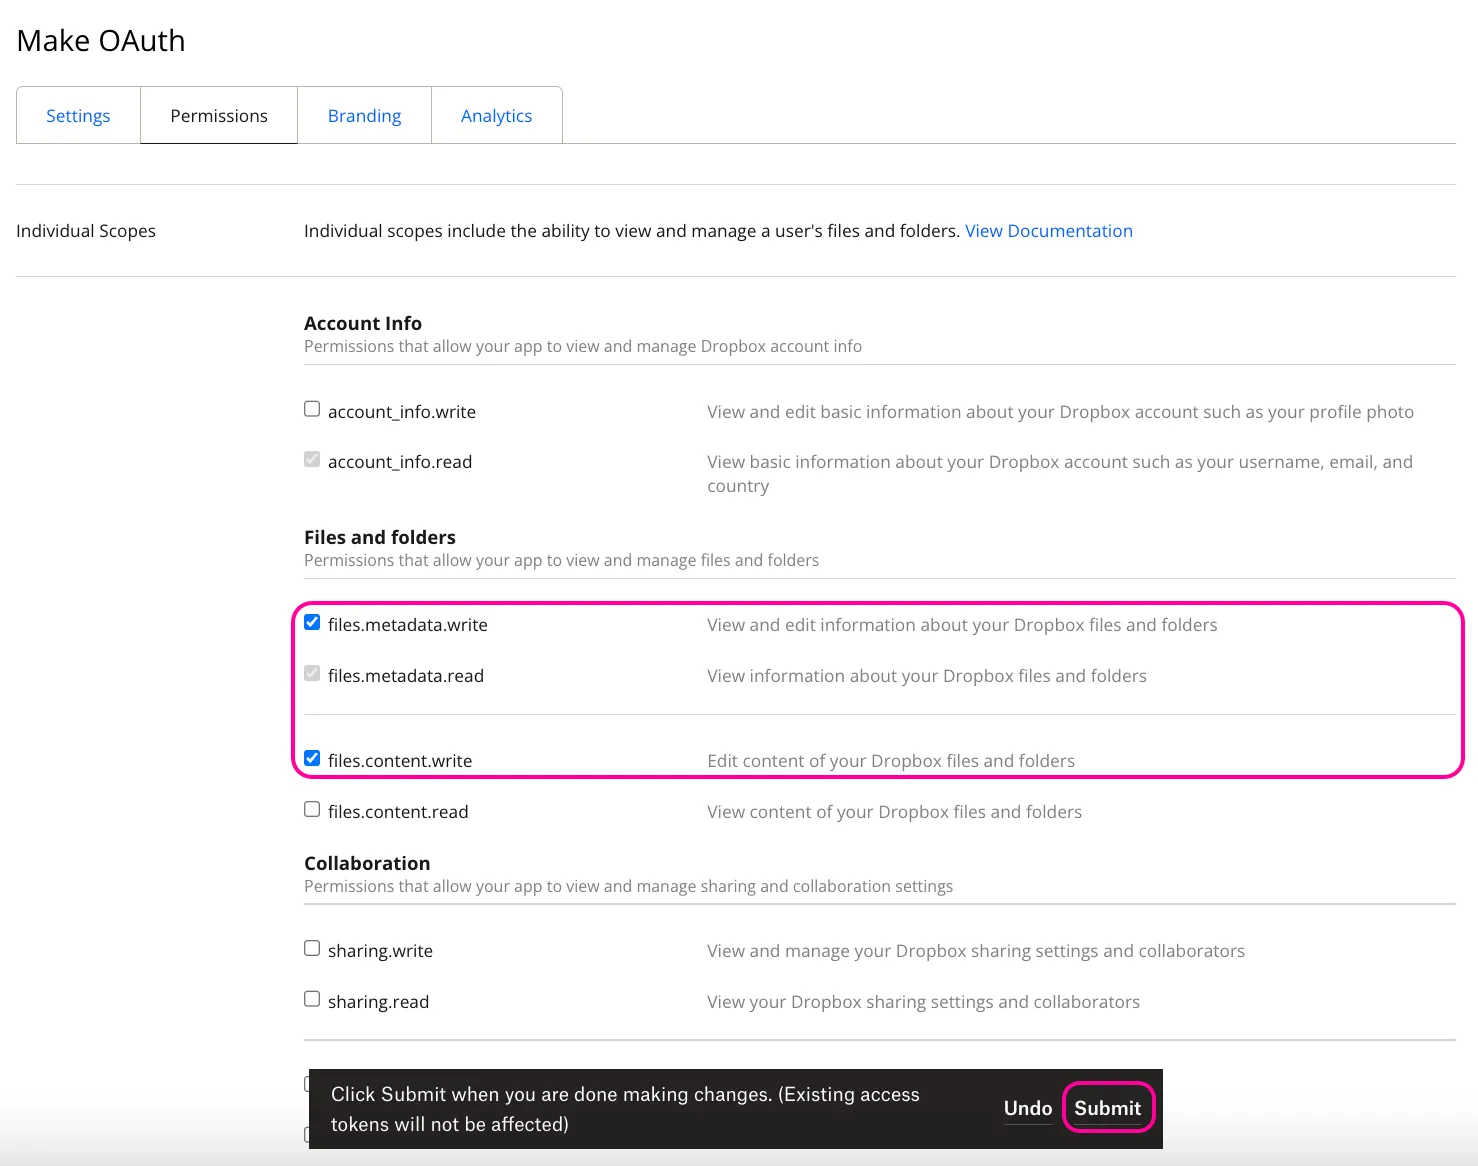
Switch to the Permissions tab. Select the scopes to let Make perform the required actions in Dropbox, and click Submit to save the changes. You will also need to add those selected scopes later when setting the connection in Make.
You can always check the API documentation of the service you're connecting to to see which scope is required for a particular action.
Once you have your client credentials and scopes, you can proceed with establishing the OAuth 2.0 connection in Make.
Establish the connection in Make
For some websites or apps that do not have a dedicated Make integration, you will need to use an HTTP > Make a request module with an OAuth 2.0 authentication type.
If Make provides a relevant app module, you can just add that module to the scenario and establish the OAuth 2.0 connection. This is usually simpler, as the module handles most of the configurations automatically.
Since Make has a Dropbox app, we can look at both cases.
Establish the connection in Make using the HTTP app
Suppose you need to create a folder in Dropbox via an HTTP POST request. Here's how to establish the OAuth connection and configure the module:
Check the required API details in the Dropbox API documentation.
Create a new scenario, or open the existing one and add an HTTP > Make a request module.

In the Authentication type field, select OAuth 2.0.

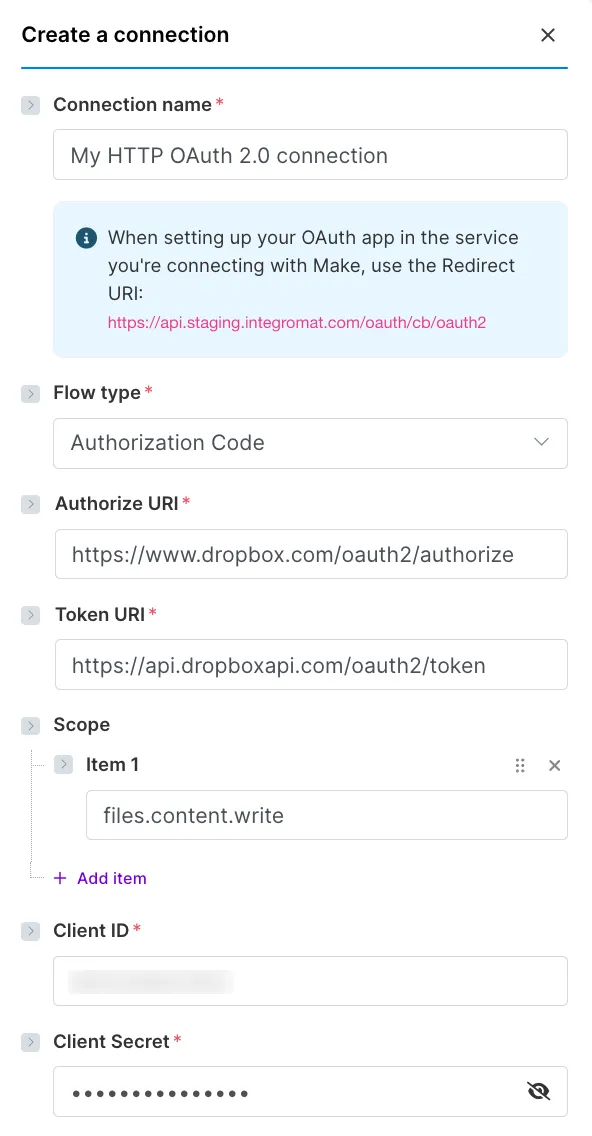
In the Credentials field, click Create a connection (or Add next to Create a connection) to create your OAuth 2.0 connection:
- In the Connection name field, enter a name for your connection.
- In the Flow type field, select Authorization Code as you'll need to enter further both an Authorize URI and Token URI.
- In the Authorize URI field, enter the Authorize URI https://www.dropbox.com/oauth2/authorize as it's defined in the Dropbox API documentation.
- In the Token URI field, enter the Token URI https://api.dropboxapi.com/oauth2/token as it's defined in the Dropbox API documentation.
- In the Scope field, click +Add item to add the required scope(s).
- In the Client ID field, add the App key you obtained from your Dropbox app.
- In the Client Secret field, add the App secret you obtained from your Dropbox app.
To avoid having to constantly refresh the connection, enable the Advanced settings toggle, and click +Add item to add the following Authorize parameters:
- Key: token_access_type Value: offline
- Key: force_reapprove Value: true
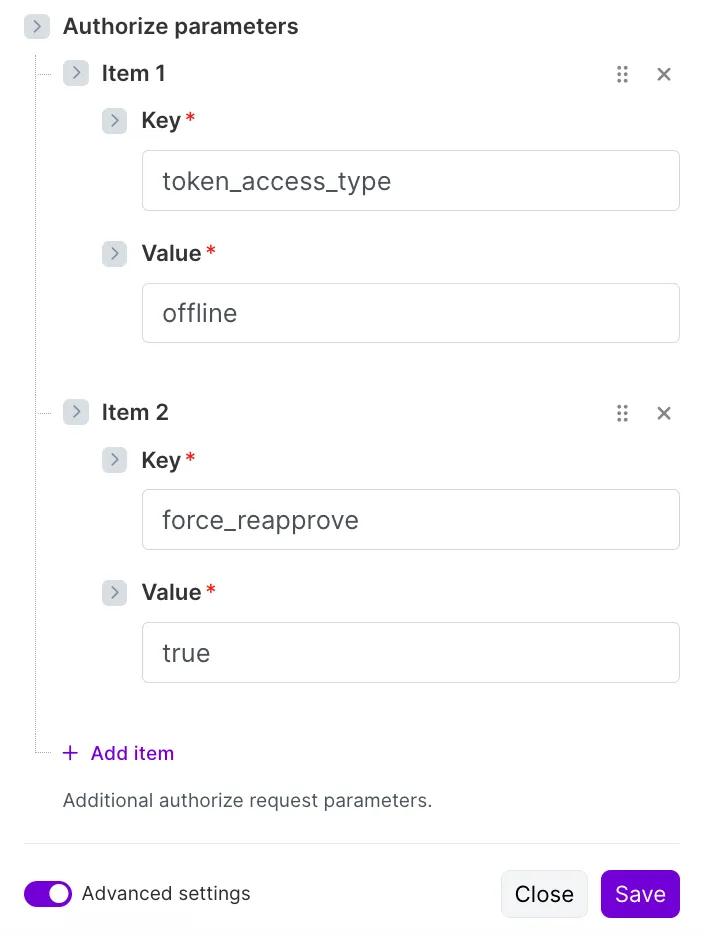
The Authorize parameters mentioned above only apply to Dropbox. Other services’ APIs may require similar parameters, but with different names.
Check the service’s API documentation to add the required Authorize parameters and avoid constant OAuth 2.0 connection refreshes.
Click Save.
Allow access in the emerging window.
Your connection is now successfully established. To check that it works, you can make an HTTP request. To create a folder in Dropbox:
In the URL field, add https://api.dropboxapi.com/2/files/create_folder_v2.
Select the POST method required for this API call.

Leave the Header and the Query sections empty.
For the Body section:
- In the Body content type field, select application/json.
- In the Body input method field, select Data structure.
- In the Body structure field, click Add to create a new data structure. Add a text field path to indicate where the folder should be created and how it should be called. You can also add the Boolean autorename field to specify whether Dropbox can autorename the folder if there's a conflict. Click Save.

- In the Body content field, add the path (/Make in this example) and disable the autorename.
Click Save and run the module.
You can now check your Dropbox storage. A new folder called Make will be created. You can also see it in the output:

Establish the connection in Make through the Dropbox app
Since there's a Dropbox app in Make with a corresponding module, you can also add it to the scenario and establish the OAuth 2.0 connection. To do that:
Create a new scenario, or open an existing one, and add a Dropbox > Create a Folder module.

Click Create a connection (or Add) to create your OAuth 2.0 connection.
In the connection configuration window:
- In the Connection name field, enter a name to distinguish your connection.
- In the Client ID field, add the Client ID you obtained from your Dropbox app.
- In the Client Secret field, add the Client Secret you obtained from your Dropbox app.
- In the Scope field, click +Add item to add the required scopes.
- Click Save.

Allow access in the emerging window.
Your connection is now successfully established. To verify that it works, you can configure the module settings and run it.
To replicate what we've done above with the HTTP > Make a request module, add 'Make' in the Folder Name field. Set the Folder to a general one.

You can now check your Dropbox storage. A new folder called Make will be created. You can also see it in the output:
