Email-triggered AI agent
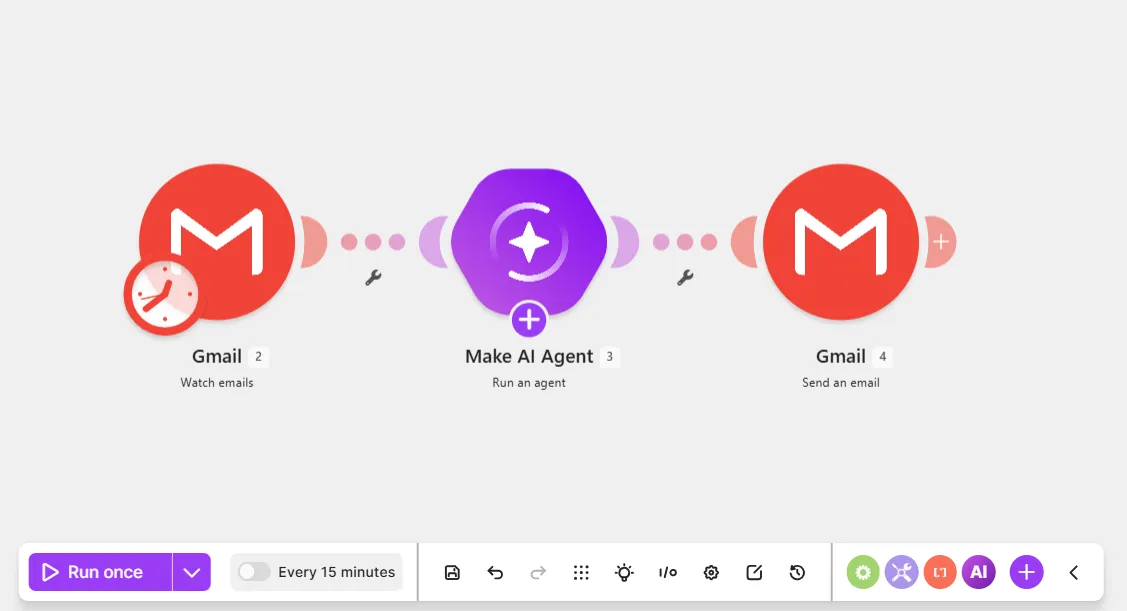
This email-triggered AI agent scenario watches new emails in your Gmail account, and the agent replies to them. The watched emails are ones you've sent to yourself with a specific subject. Later, you can tailor the watch criteria to your needs.
Prerequisites
- A Gmail account
- A test email, with any text and subject, sent to your personal email
Step 1. Add Watch emails module
The Gmail > Watch emails module watches your Gmail account for new emails.
To add a Watch emails module:
In the Scenario Builder, click the giant plus.
In the app search, search for and click Gmail.
Select the Watch emails module.
In Connection, select an existing Gmail connection from the dropdown or click Add to add a new one.
Optionally, in Label, you can filter the emails by label.
Toggle Advanced settings.
In Sender email address, enter your personal email address so that the module only watches emails from that address.
Optionally, in Subject, add the specific subject to watch for.
Click Save.
In the dialog that prompts you to choose where to start processing data, click the link.
In the Choose where to start dialog, select Choose manually and select the first option (the email you sent yourself earlier).
Click Save on the Scenario toolbar.
Click Run once on the Scenario toolbar to retrieve your test email and have data to map in other modules.
Click the output bubble to view the output items that you can share with the agent. For example, the Full text body value is the content of the email.
You've now added the Gmail > Watch email module to the scenario.
Step 2. Add the Run an agent module
To add the Make AI Agent (New) > Run an agent module:
Click the plus icon next to the Gmail > Watch emails module.
In the app search, search for and click Make AI Agent (New).
Click the Run an agent module.
In Connection, select an existing AI provider connection from the dropdown or click Add to add a new one.
If you don't want to set up an account with an AI provider, select Make's AI Provider.
In Model, select a model from your chosen AI provider.
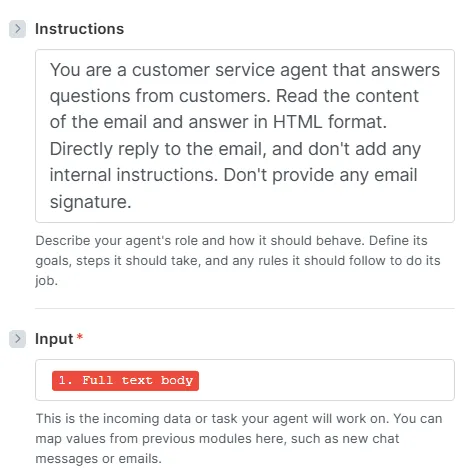
In Instructions, describe who the agent is and what it does. You can copy-paste the below:
You are a customer service agent that answers questions from customers. Read the content of the email and answer in HTML format. Directly reply to the email. Don't provide any email signature.
In Input, map the Full text body value from the Gmail > Watch emails module so that the agent accesses the email content. Later, you can add other values that the agent needs, such as Date and From (name).
In Conversation ID, map the Thread ID value from the Gmail > Watch emails module. This action retrieves the email history so the agent remembers previous emails in case the user replies.
Click Save.
Click Save on the Scenario toolbar.
You've now added the Make AI Agent (New) > Run an agent module to your scenario.
Step 3. Add a Reply to an email module
Add a Gmail > Reply to an email module so the agent replies to incoming emails.
To add a Reply to an email module:
Click the plus icon next to the Make AI Agent (New) > Run an agent module.
In the app search, click Gmail.
Click the Reply to an email module.
In Connection, select your existing Gmail connection.
In Thread ID, map the Thread ID value from the Gmail > Watch emails module. This action allows the agent to reply directly to the initial user email.
In Body contents, click Add body content.
In Text, map the Response value from the Run an agent module, so the agent sends its response as the email reply.
Click Save.
Click Save on the Scenario toolbar.
Test your scenario:
- Click the down arrow next to Run once on the Scenario toolbar.
- In Scenario run, select the previous scenario run to use its trigger data as test data.
- Click Run once.
- Check your inbox for a reply from the agent.
You've now created an email-triggered AI agent scenario.