Get started with Make MCP server
In this step-by-step guide, build a scenario as an MCP tool in Make and call it from an MCP client. By following this simple example, you'll learn how to extend AI capabilities with Make by using scenarios in AI assistants and other applications.
You'll follow these steps:
- Build a simple scenario as an MCP tool.
- Connect Make MCP server to an MCP client (Claude).
- Call the scenario from the client.
Prerequisites
- Make account (any plan)
- Claude account
If you want to use a different MCP client, refer to the Developer Hub documentation in the Usage page of that client for Step 2.
In this example, you'll build a scenario that searches your Gmail account for unread emails. When Claude calls it, the scenario returns the emails so Claude can read and summarize them.
You'll follow these steps to build the scenario:
- Add a Gmail > Search emails module to return all unread emails.
- Set the scenario to active and schedule it to on demand so MCP clients can discover it.
- Define scenario outputs to specify the data returned to MCP clients.
- Add an Array aggregator module so the MCP client receives all returned emails.
- Add a Scenarios > Return outputs module and map outputs to the defined scenario outputs.
- Add a scenario description to help MCP clients decide when to call the scenario.
Once you complete these steps, your scenario is ready to be used as an MCP tool that Claude can call.
Add a Gmail module
The Gmail > Search emails module returns all unread emails from Gmail.
To create the scenario and add the Gmail module:
In Make, click Create scenario in the top-right corner.
On the canvas, click the giant plus and search for the Gmail > Search emails module.
Click Create a connection. In the dialog:
- Name your Gmail connection.
- Click Sign in with Google and complete the consent flow for the Gmail account that Make can access.
In the module settings, configure the Gmail > Search emails module:
- In Filter type, select Gmail filter from the dropdown.
- In Query, add an is:unread filter to show only unread emails.
- In Limit, enter the maximum number of emails to return at once. For this example, enter 10.
- In Advanced settings > Content format, select Full content from the dropdown. This email format is easy to process and includes body, subject, and other key fields.
- Click Save, then Run once.

You've now added a Gmail module.
Schedule and activate the scenario
All scenarios used as MCP tools must be active with on-demand scheduling to be exposed to MCP clients.
To schedule and activate the scenario:
Click the clock icon on the Gmail > Search emails module to open Schedule settings.
In the Run scenario field, select On demand from the dropdown, then click Save.
Click Activate scenario.
You've now scheduled and activated the scenario.
Define scenario outputs
In MCP tools, scenario outputs define the data that scenarios return to MCP clients.
To define the scenario outputs:
Click the Scenario inputs and outputs icon on the scenario toolbar.

In Scenario outputs, configure your output item, email_data, which returns the message data of all unread emails to the MCP client:
- Name: email_data
- Description: All of an email's message data
- Type: Dynamic collection
- Required: Yes
While your scenario output is email_data here, output items can include any scenario data—such as the email sender or body, in this case.

Click Save.
You've now defined scenario outputs.
Add an Array aggregator
As the Gmail > Search emails module returns unread emails as individual bundles bundles, the Array aggregator module is needed to accumulate all emails into one bundle. This action enables Make to return all emails, not only the first, to the MCP client.
To add an Array aggregator:
Add the Array aggregator module to the Gmail > Search emails module.
In the module settings, in Aggregated fields, select these fields to aggregate:
- Date
- Subject
- From (email)
- Snippet
Click Save.
You've now added an Array aggregator.
Add a Return output module
To return the defined scenario outputs to the MCP client, the scenario must end with a Scenarios > Return output module.
To add this module:
Add the Scenarios > Return output module to the Array aggregator module.
In email_data, map the Array aggregator [bundle], shown below. This bundle contains the aggregated email message data of all unread emails.

Click Save.
Click Save on the toolbar.
You've now added a Scenarios > Return output module.
Describe the scenario
The scenario description helps MCP clients and other AI systems to understand when to use the scenario.
To describe the scenario:
Next to the scenario name, click the arrow icon, then click Save changes.

In the top-right corner, click Options and select Edit description.

In Description, briefly describe the purpose of this scenario.

Click Save.
Once you've described your scenario, it's ready to use as an MCP tool for an MCP client. Next, connect Make to your client, Claude.
Connect Make MCP server to an MCP client, Claude, to allow the client to call your scenario.
To connect:
Open Claude and click your profile name on the left sidebar.
Select Settings.
Go to Connectors.
Click Browse connectors.
Search for Make and click the plus sign.
In the OAuth consent screen, select a Make organization and its granted scopes.
- In Organization, select the organization that contains the MCP tool that you built earlier.
- Select your scopes:
- If you're on a Free plan: Select Run your scenarios only.
- If you're on a Paid plan: You can also select management scopes such as View and modify your scenarios and View and modify your teams and organizations.
You determine the MCP tools available through your scopes:
- The scenario run scope (Run your scenarios) allows clients to view and run active scenarios with on-demand scheduling.
- Management scopes (View and modify your scenarios and View and modify your teams and organizations) allow clients to view and modify the contents of your Make account.

Click Allow.
In Connectors, notice that Make is now connected.
Optionally, click Configure to define tool-based permissions.
You've now connected Make MCP server to Claude.
To call your scenario from the chat in Claude:
In Claude, select New chat in the left sidebar.
Ask Claude a question that your MCP tool can help answer. For example, "What are my unread emails today?"
When Claude requests permission to use your MCP tool, click Allow once or Always allow.
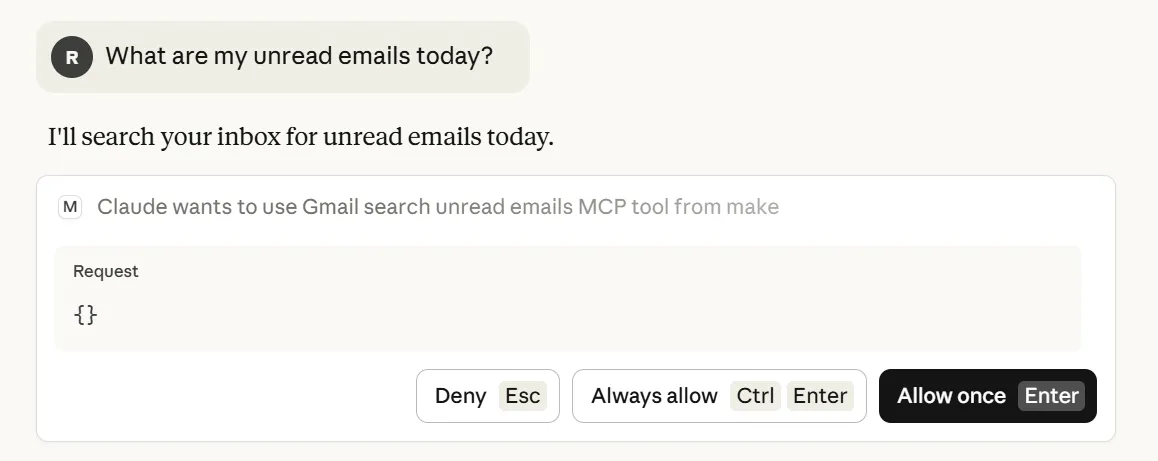
After you grant permission, Claude calls the MCP tool and returns the scenario outputs defined earlier (email_data).
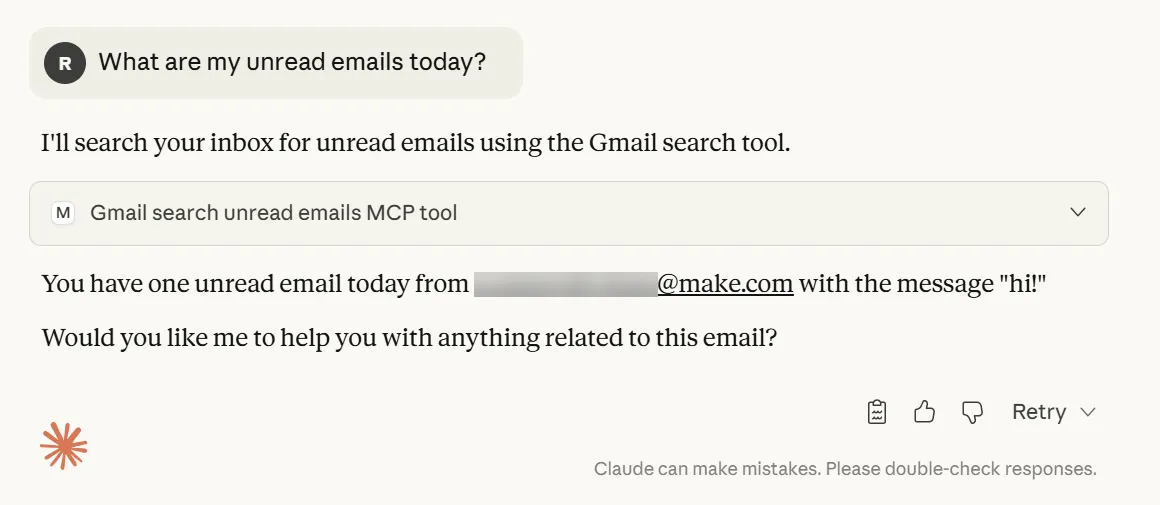
You've now called your tool from Claude.
Now that you've built an MCP tool in Make and connected Make to an MCP client, you can explore additional connection methods and build more complex scenarios.