Google SAML
This feature is available to Enterprise customers.
The following manual configuration creates an SAML SSO configuration for your Enterprise organization.
Prerequisites
- Owner role in an Enterprise organization
- Google Admin console account
Supported features
This configuration supports the following:
- Service Provider initiated SSO
- Single Log Out [optional]
Configuration Steps
Before configuring SSO, you need to assign a namespace and download your service provider certificate in Make. These steps provide information you need to enter later.
Create your namespace in Make
Click Organization in the left sidebar.
Click the SSO tab.
Under Namespace, enter the namespace you want for your organization. For example, acmecorp. Your organization members enter this namespace when they log in via SSO.
Under SSO type, select SAML 2.0.
Copy the Redirect URL and save it in a safe place. You will use this later when you create your SAML integration in the Google admin portal.
Create an SAML application in the Google admin portal
Login to the Google admin console.
From the dashboard's left menu, click Apps > Web and mobile apps.

Click Add app and select Add custom SAML app.

Enter an App name and Description.
Copy the SSO URL and save it in a safe place. You will use this later.
On the same screen, download the certificate and save it in a safe place.
Click Continue.
Enter the Service provider details. You can find thise information in the Make SSO configuration tab.
ACS URL: https://www.make.com/sso/saml/{namespace}
Entity ID: https://www.make.com/sso/saml/{namespace}/metadata.xml
Replace {namespace} with your namespace.

Click Continue.
Enter the App attributes.

Update the User access to On for everyone.

Update the SSO in Make
Click Org in the left sidebar.
Switch to the SSO tab.
Activate the Service Provider Certificate and download it.
In the Identity Provider Certificate section, click Extract. In the P12, PFX or PEM file field, upload the certificate downloaded from step 6 of Create an SAML application in the Google admin portal above. Then click Save.
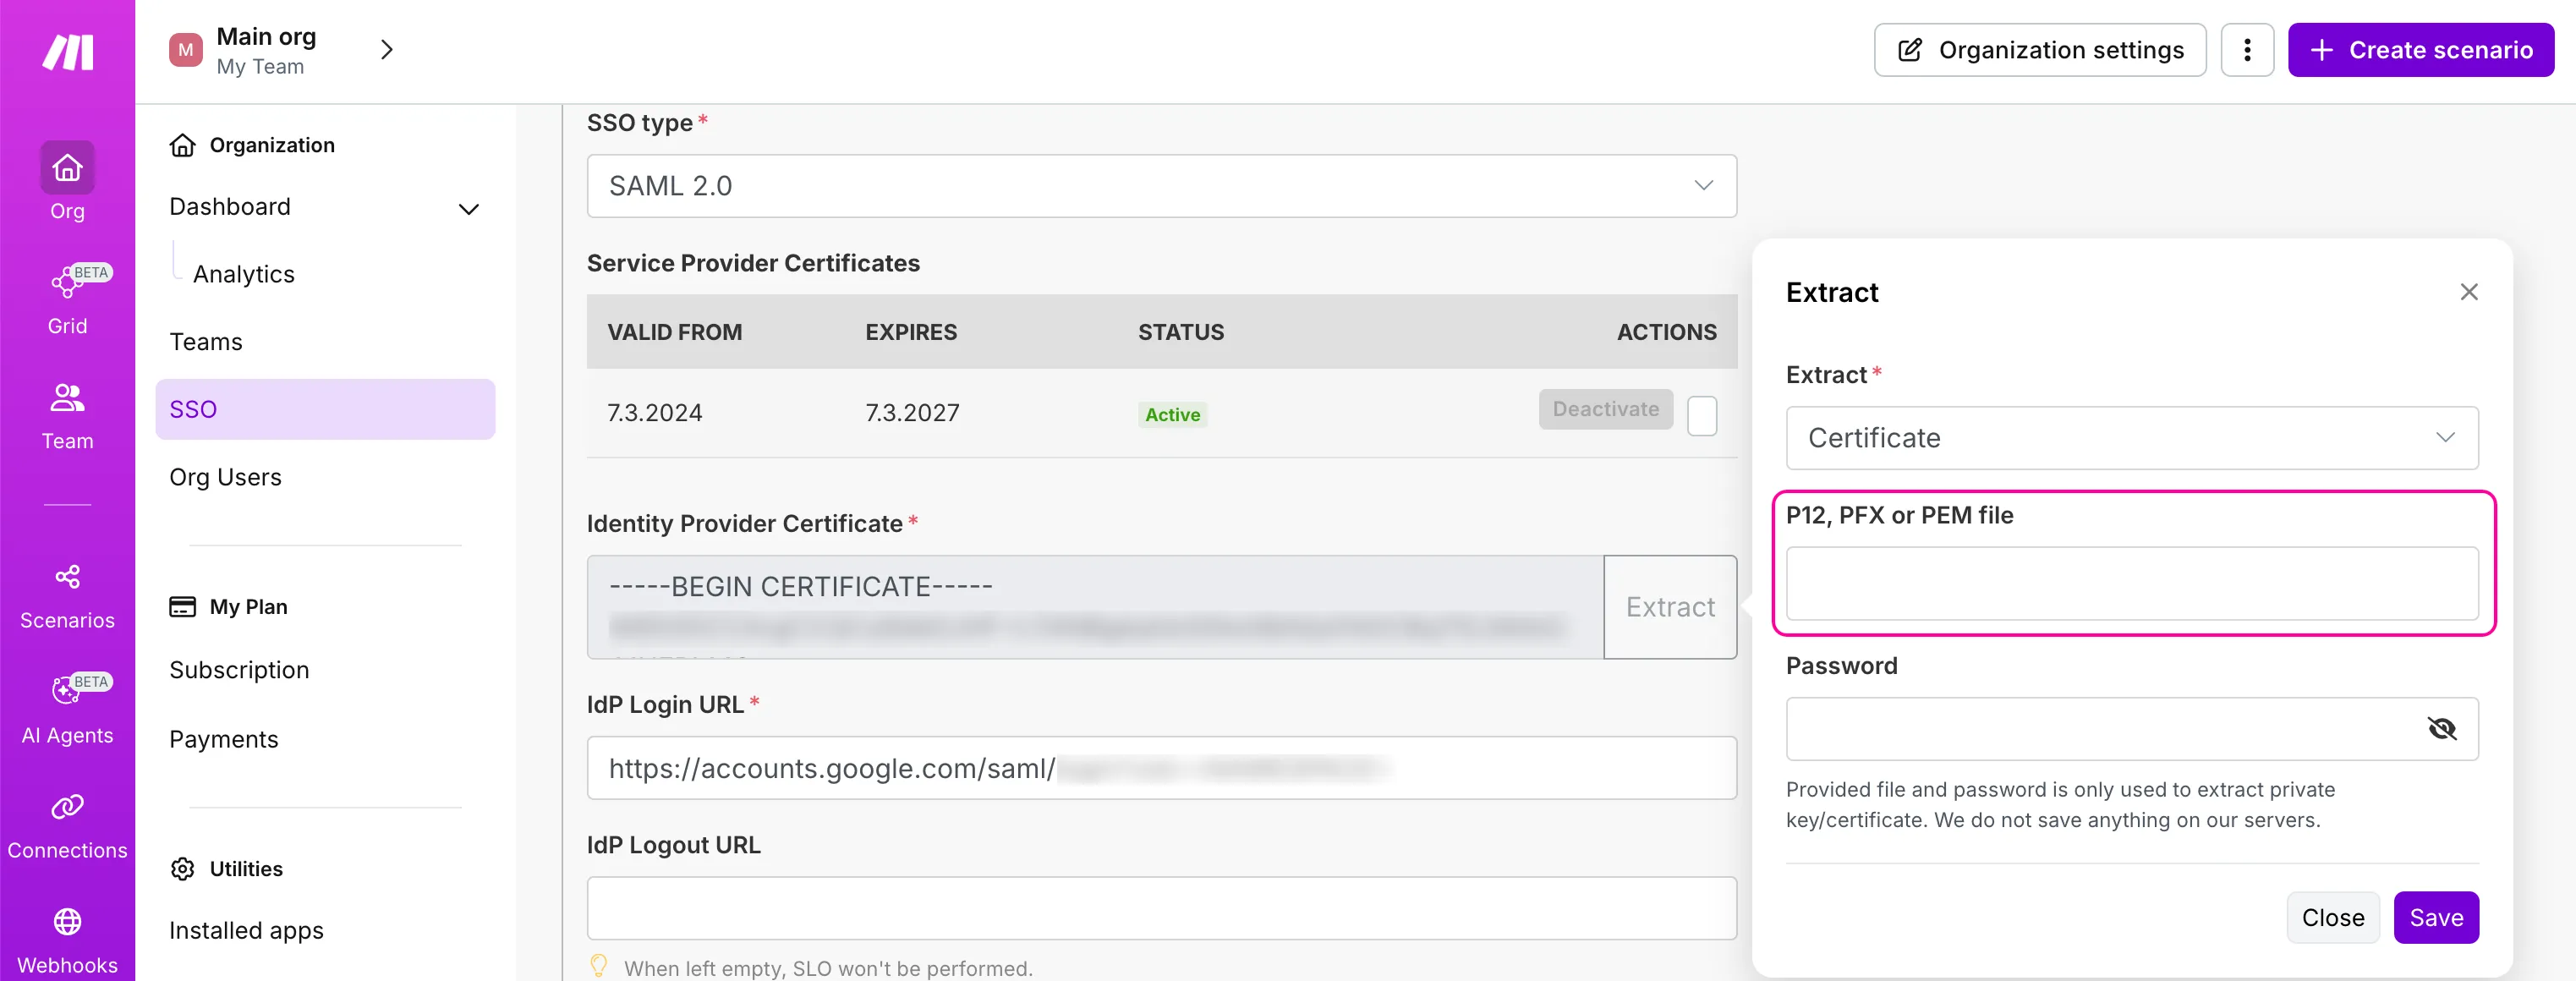
Enter the SSO URL from step 5 of Create an SAML application in the Google admin portal above and paste it into the IDP Login URL field in Make.
Enter the Login IML resolve.
{
    "email": "{{get(user.attributes.email, 1)}}",
    "name": "{{get(user.attributes.firstName, 1)}}{{get(user.attributes.lastName, 1)}}",
    "id": "{{get(user.attributes.email, 1)}}"
}
Optional: It is a good practice to validate the JSON string in IML Resolve to ensure it is correct. You can use the JSONLint website to perform this validation.
Enter the following additional information:
Allows Unencrypted Assertions: No
Allow Unsigned Responses: No
Sign Requests: Yes

Service provider initiated SSO
Go to make.com.
Click Sign in with SSO.
Enter the namespace you chose for your organization.
Log in using your Microsoft credentials and consent to Make's access to your user data.