Slack-triggered AI agent
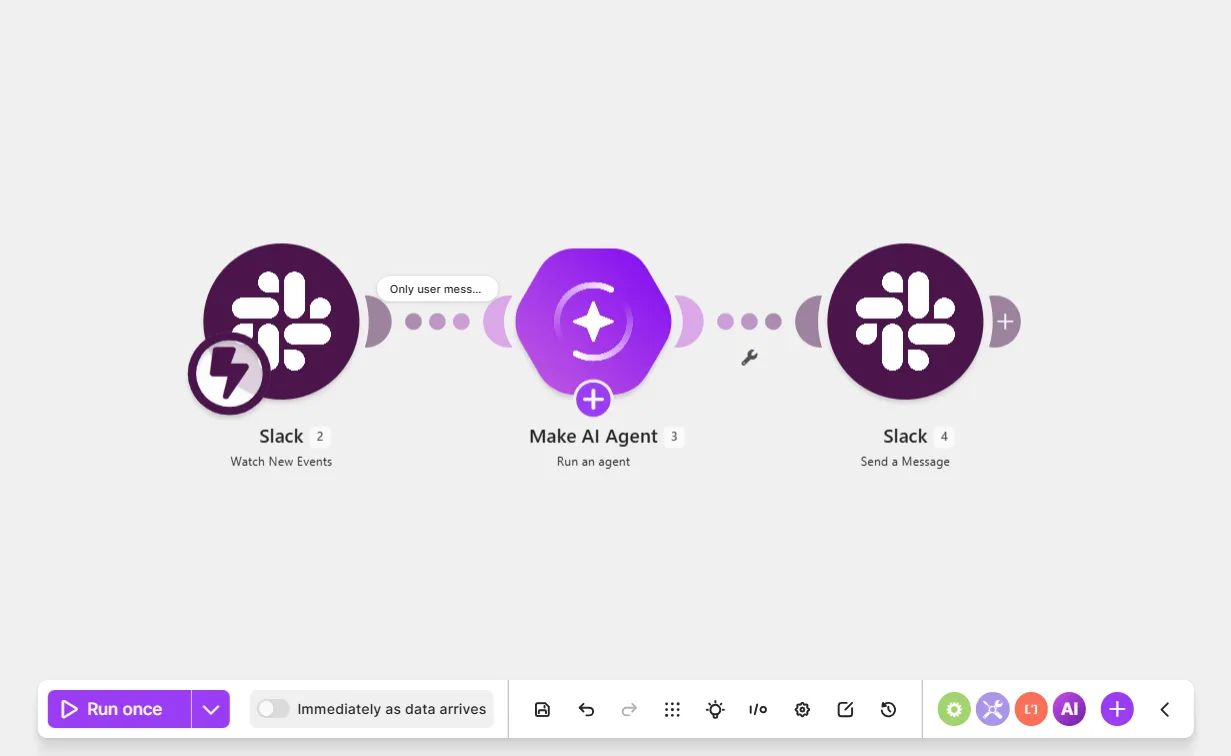
This Slack-triggered AI agent scenario watches a Slack channel for new user messages and the agent replies to them.
Prerequisites
- A Slack account with a private channel for interacting with the agent
While a private channel is more convenient for testing, you can use either a private or public channel.
Step 1. Add a Watch New Events module
The Slack > Watch New Events module watches your Slack channel for new messages, so the agent receives them when they arrive.
To add a Watch New Events module:
In the Scenario Builder, click the giant plus.
In the app search, search for and click Slack.
Click Watch New Events.
In Webhook name, name your webhook to identify it later.
In Event type, select the following from the dropdown:
- New private channel message (for a private channel)
- New channel message (for a public channel)
In Connection, click Add to create a new Slack connection or select an existing one from the dropdown.
In Channel, select the channel that you set up earlier.
Click Save.
Test the Slack > Watch New Events module:
- Click Run once on the Scenario toolbar.
- In Slack, send a message in your channel.
- In the Scenario Builder, click the output bubble next to the module to view the data items in an output bundle. For example, the Text value is the user message.
If you've sent a message to your Slack channel, but the module hasn't received data yet:
- Wait a few minutes. Slack webhooks sometimes delay in detecting messages.
- Stop the scenario run and click the down arrow next to Run once to run the scenario using data from a previous run.
You've now added the Slack > Watch New Events module to your scenario.
Step 2. Add a Send a Message module
Now that you've added a module that sends new Slack messages to your agent, add a Slack > Send a Message module to allow the agent to reply to them.
To add a Slack > Send a Message module:
In the Scenario Builder, click the plus icon next to the Slack > Watch New Events module.
In the app search, click Slack.
Search for and click Send a Message.
In Connection, select your Slack connection.
In Channel ID or name, click the field and map the Channel value from the Slack > Watch New Events module.
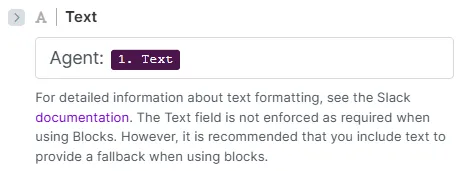
In Text, configure the reply:
- Click the field and map the Text value from the Slack > Watch New Events module.
- Before the Text value, enter custom text, such as "Agent:", to specify that the reply is from an agent. Without this text, the agent won't distinguish user and agent messages, causing it to reply to itself in an infinite loop. Later, you'll filter messages with the "Agent:" text, so the agent only processes user messages.
Optionally, to clearly distinguish between agents and users, create a Slack app and create a Bot connection. This way requires a more complex setup.
Toggle Advanced settings.
In Thread message ID (time stamp), enter a function for Slack timestamps:
- Click the field, and search for and click the Ifempty function.
- In the function, before the semicolon, map the Thread Timestamp value from the Slack > Watch New Events module.
- After the semicolon, map the Timestamp value from the Slack > Watch New Events module.
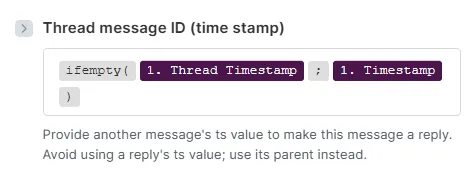
You use a function here so that the agent replies in the Slack thread after receiving the first message. The function covers two types of Slack timestamps:
- Timestamp: The identifier of the first message of the Slack thread.
- Thread timestamp: The identifier of the Slack thread once the thread has a reply (unavailable for the first message).
Click Save.
Click Save on the Scenario toolbar.
Right-click the route between the modules and select Set up a filter.
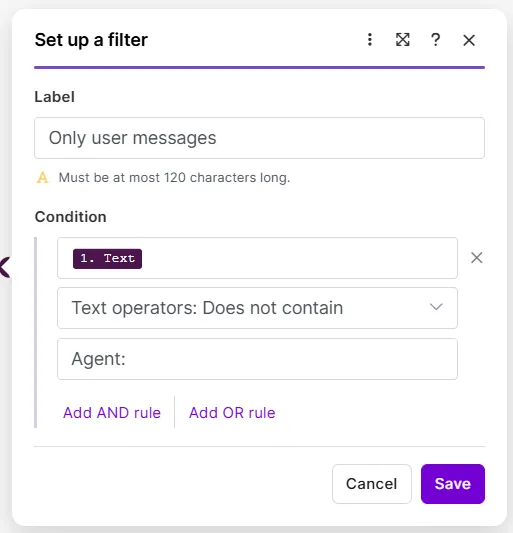
Set up a filter that allows only user messages to pass through, so the agent doesn't reply to itself in an infinite loop:
- In Label, name your label "Only user messages."
- In Condition, map the Text value from the Slack > Watch New Events module, select Text operators: Does not contain, and enter "Agent:":
- Click Save.
Test the Slack > Send a Message module:
- Click Run once on the Scenario toolbar.
- In Slack, send a message in your channel.
- Check if you see a reply in the same thread beginning with "Agent:" in the same thread. This means the module works.
Toggle Immediately as data arrives on the Scenario toolbar to activate the scenario, so that the scenario automatically receives new messages from Slack.
Click Save.
Click Save on the Scenario toolbar.
You've now added your Slack modules to your scenario .
Step 3. Add a Run an agent module
To finish your scenario, add the Make AI Agent (New) > Run an agent module.
To add the Run an agent module:
Right-click the route between the Slack modules and select Add a module.
In the app search, search for and click Make AI Agent (New).
Select the Run an agent module.
In the module settings, in Connection, select an existing AI provider connection from the dropdown or click Add to create a new one.
If you don't want to set up an account with an AI provider, select Make's AI Provider.
In Model, select a small model. Smaller models react quickly to new data, which is ideal for this chat-based AI agent.
In Instructions, describe who the agent is and what it does. For example, "You are a helpful agent. Answer with a warm and friendly tone."
For now, the sample instructions provided are sufficient. Later, you can tailor them to the agent's workflow.
In Input, map the Text value from the Slack > Watch New Events module. This action gives the agent access to incoming Slack messages.
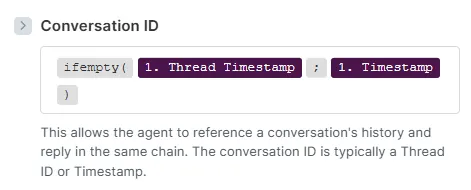
In Conversation ID, enter the same function that you added to the Thread message ID (time stamp) field in the Add a Send a Message module step.
This action allows the agent to remember previous exchanges with a user, and provide contextual responses when the user asks follow-up questions in the same thread.
Click Save.
Click the Slack > Send a Message module.
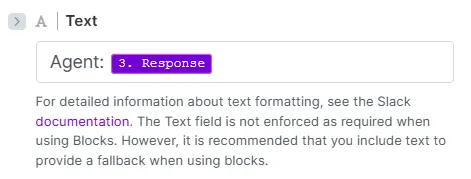
In Text, keep the custom "Agent:" text and replace the Text value with the Response value from the Run an agent module. This action allows the agent to reply with its own response.
Click Save.
Click Save on the Scenario toolbar.
Send a message to your channel in Slack to check if the agent works.
You've now built a Slack-triggered AI agent scenario.