Organizations
Organizations are the basic containers into which all scenarios, users, and data belong.
Organizations usually represent a company that is a Make customer or partner. Each organization has separate pricing plan and billing. This means that you can also monitor your credits and data consumption for each organization separately.
Each organization allows you to select the geographical location of the data center where the organization's data will be stored and processed. Currently, Make supports two data center locations:
- United States (US)
- European Union (EU)
The geographical location that you select for an organization does not represent where your company or your users are located, but where the data center that stores and processes your data is located.
We recommend that you select the location closest to you to ensure low latency.
You cannot change the location of the data center after you create the organization.
Create an organization
Any user can create their own organization, even if they are already a member of another organization.
Click on your username in the top-right menu.
Select Profile from the dropdown.
In the Organizations tab, click the Create organization button in the top-right corner.
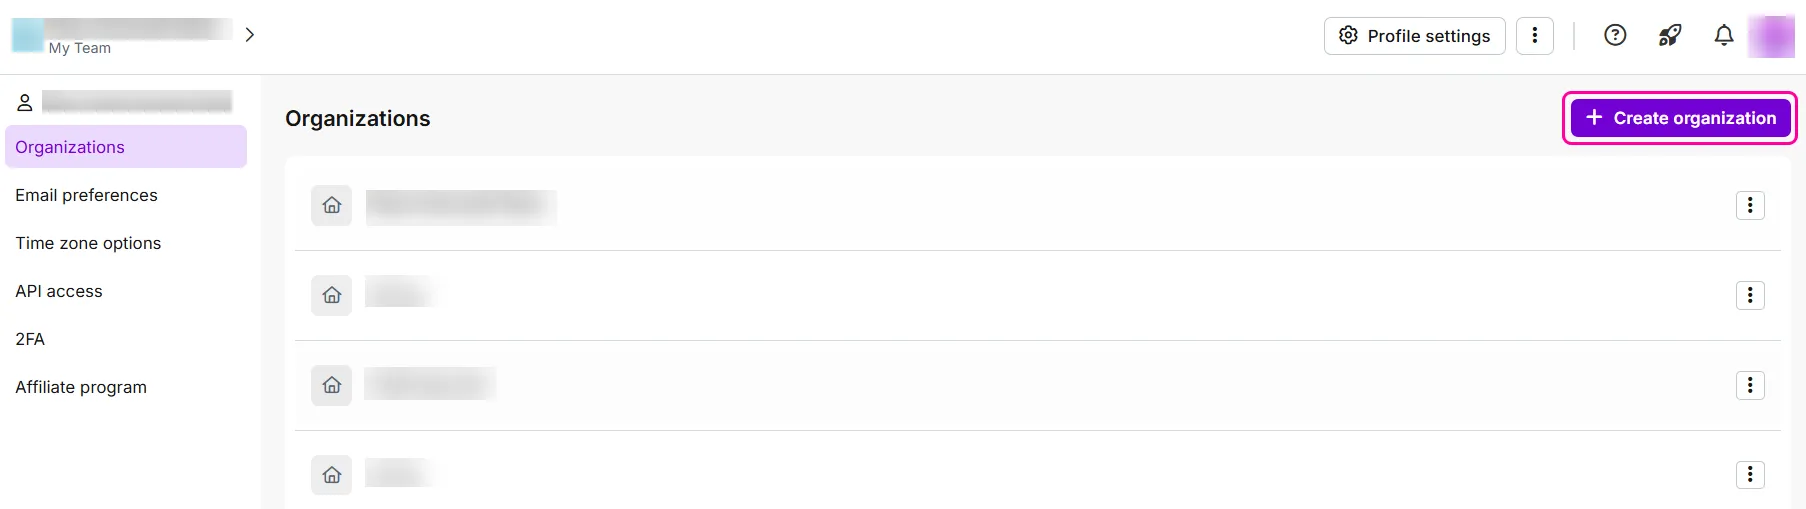
In the dialog, enter the details of the new organization.
- The Organization name. The name must be between 1 and 128 characters long. Use only letters, numbers, spaces, and allowed special characters. Names can't start or end with spaces.
- The Region field represents the location of the data center that will store and process your data.
- The Timezone field represents the time zone used for scheduling scenarios and parsing dates.
- The Country field represents your physical location, but is currently not used by Make in any way.
If you have multiple affiliate partners as team members of your organization, you can set the affiliate partner for shared scenarios.
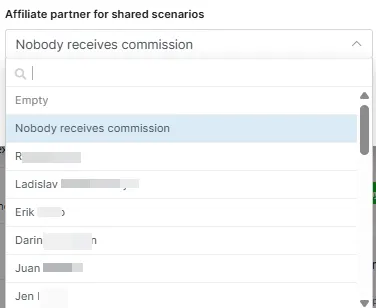
Click the Save button.
By default, the organization is on a Free plan and has one team, called My Team.
Add users to an organization
To add users to an organization, you must be the owner or an admin of the organization. For more details about roles, refer to organization rolesOrganization roles.
In the left sidebar, click Org.
Click the Org Users tab.
Click the Invite user button in the top-right corner.
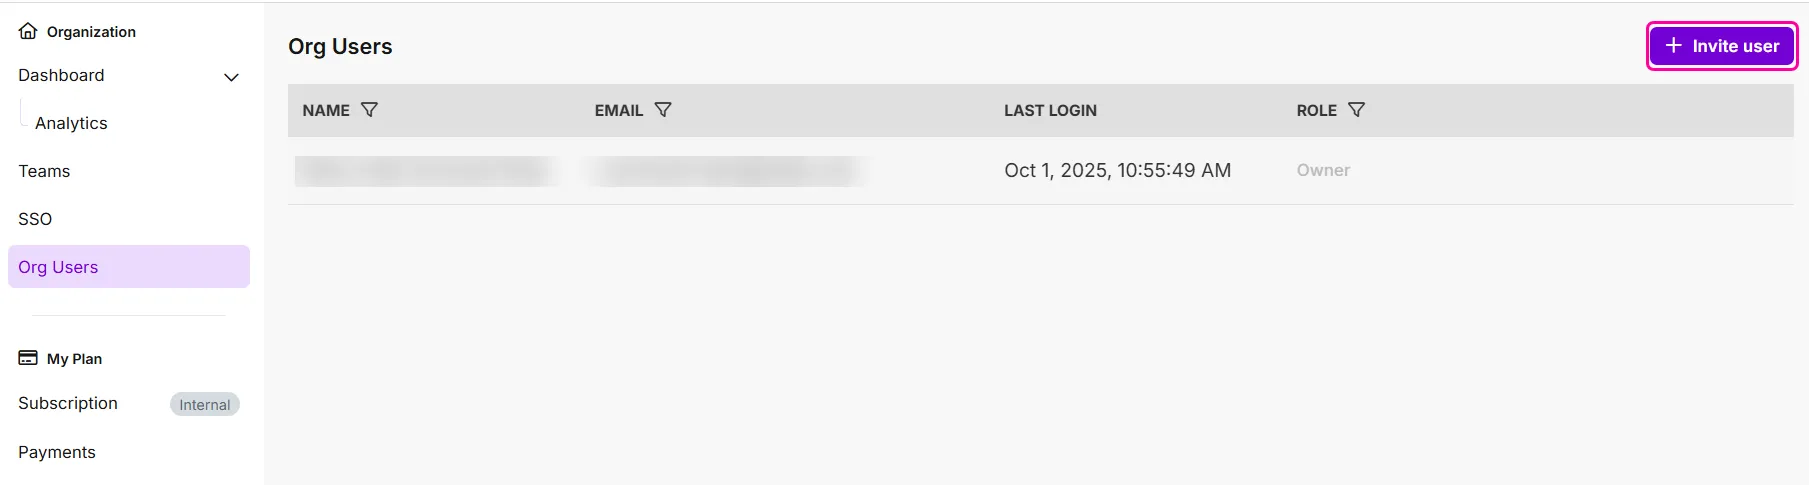
In the dialog, enter the user's details.
- Email: The invited user's email address.
- Name: The name of the user, which the user can change after accepting the invitation.
- Team: The user's team (My Team by default).
- Role: The user's role in the organization.
- Note: An optional custom message to add to the invitation email.
Click the Save button.
The user will receive an invitation email with an Accept invitation button.
When the user accepts the invitation, Make adds them to the organization.
The invitation expires in 7 days. If the invited user does not accept the invitation:
- Remove the invited user from your organization.
- Send a new invitation.
Remove a user
To remove users from an organization, you must be the owner or an admin of the organization.
In the left sidebar, click Org.
Click the Org Users tab.
Click the role in the Role column and select Remove from the dropdown.

Click the Remove user button.
Organization roles
Organization roles and team roles control what you can access and manage in Make.
An organization role controls organization-wide settings and resources. A team role controls resources that belong to a specific team.
Owner and Admin include access to all standard teams, which gives implicit Team Admin access in those teams. A custom organization role with the View all teams permission has the same effect. For every other organization role, access to scenarios and other team-owned resources depends on the user's role in each team.
Feature availability also depends on the organization's plan. To view the complete, current permission set for a role, go to Org > User roles, select Organization roles or Team roles, and select a role.
The following table describes actions that members of different organizational roles can perform.
For information about team roles, read the article about teams.
Role | Permissions |
|---|---|
Owner | Has full organization access. Is the only role that can transfer ownership or delete the organization. Manages users, teams, custom roles, organization settings and resources, apps, agents, connected systems, audit logs, billing, and subscription settings. Has implicit Team Admin access in all standard teams. |
Admin | Administers organization-wide settings, including users, teams, custom roles, organization resources, apps, agents, connected systems, audit logs, billing, and subscription settings. Can't transfer ownership or delete the organization. Has implicit Team Admin access in all standard teams. |
Member | Views organization details, users, credit usage, installed apps, templates, variables, and analytics. Uses connected systems and accesses their own private space. Access to shared team resources depends on their team role. |
Accountant | Views organization, user, credit, installed-app, template, billing, payment, and payment-method information. Can't change billing or organization settings. Access to team resources depends on their team role. |
App Developer | Views relevant organization information. Installs and manages apps, and creates or uses agents and connected systems. Access to team resources depends on their team role. |
Guest | Views basic organization details. Mainly receives credential requests; Team Guest provides the request-specific access. Guest alone doesn't grant general access to team data. |
Custom organization roles let you assign a tailored set of permissions instead of a default role. To learn more, see Custom roles.
Switch organizations
If you're a member of multiple organizations, you can change the active organization by clicking on your name in the top-right corner and selecting another organization.

Transfer ownership
When you create an organization, you automatically become the owner of the organization. Organization owners can manage and access all teams in an organization. An organization can have only one owner.
If you are the owner of an organization, you can transfer ownership to any member of your organization:
In the left sidebar, click Org.
Click on your username in the top-right corner.
Go to Organization settings > Transfer ownership.
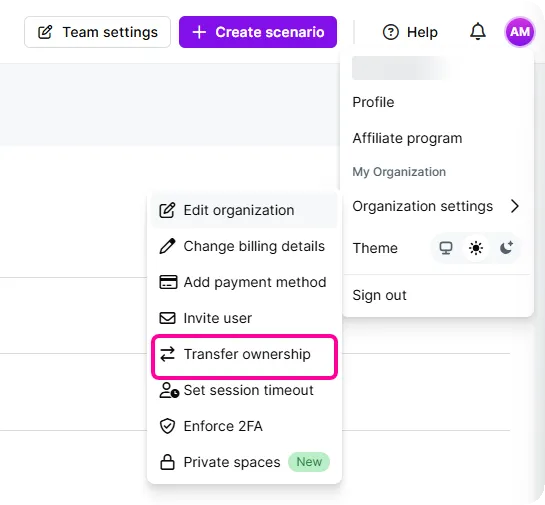
In the User dropdown, select the organization member you want to be the owner of the organization.
All current organization members appear in the menu. Once a new member accepts the invitation, you can transfer ownership to them.
Click Save.
A purple pop-up appears confirming that ownership has been transferred successfully.
Ownership transfers can only be performed by existing organization owners. If you do not have owner access, reach out to our Support.
Delete an organization
You can delete an organization only if you are the owner of the organization. You can't delete an organization owned by other users.
Click on your username in the top-right corner.
Select Profile.
In the Organizations tab, you will see a list of all organizations you have access to.
Click the three dots next to the organization you want to delete, then Delete.
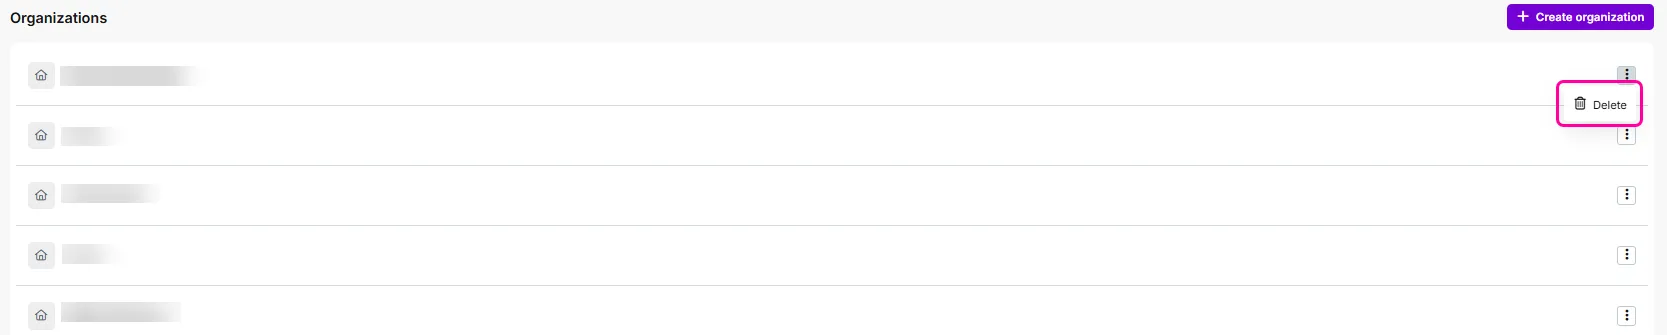
In the dialog, type the name of the organization you want to delete, then click Delete organization.
You can't undo this action. Your organization will be permanently deleted and it can't be retrieved.
Your organization has been deleted.