Scenario sharing
Scenario sharing allows you to create a public scenario page that you can share with others via a link or post on social media. Anyone with the link can view the public scenario page or log in to Make and create a copy of a shared scenario in their Make account and then edit or use it.
Unlike with blueprints, you don’t need to export, import, re-export, and copy scenario blueprints after any change. The link always shows the latest saved version of the scenario.
Sharing scenarios through a link is also faster and more flexible than sharing them through templates. In particular, when you simply want to demonstrate an automation, viewers don't have to log in or sign up for a Make account to see it.
Create a link to share scenario
To create a link for sharing a scenario:
Create a new scenario or open an existing one.
If it’s a newly created scenario, you will need to save the scenario before sharing it.
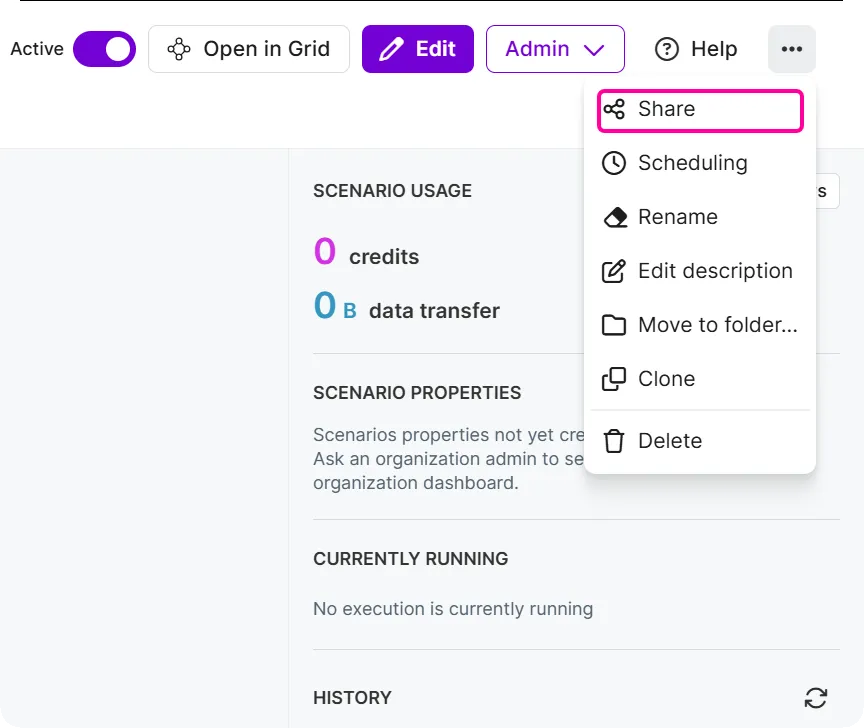
In the upper-right corner of the Scenario Builder, click Share.

For an existing scenario, you can also click Share in the scenario diagram.
In the Share scenario window, you will see the scenario name and the thumbnail (preview image). This thumbnail is created automatically. See how to edit it here.
Switch on the Public scenario page toggle.
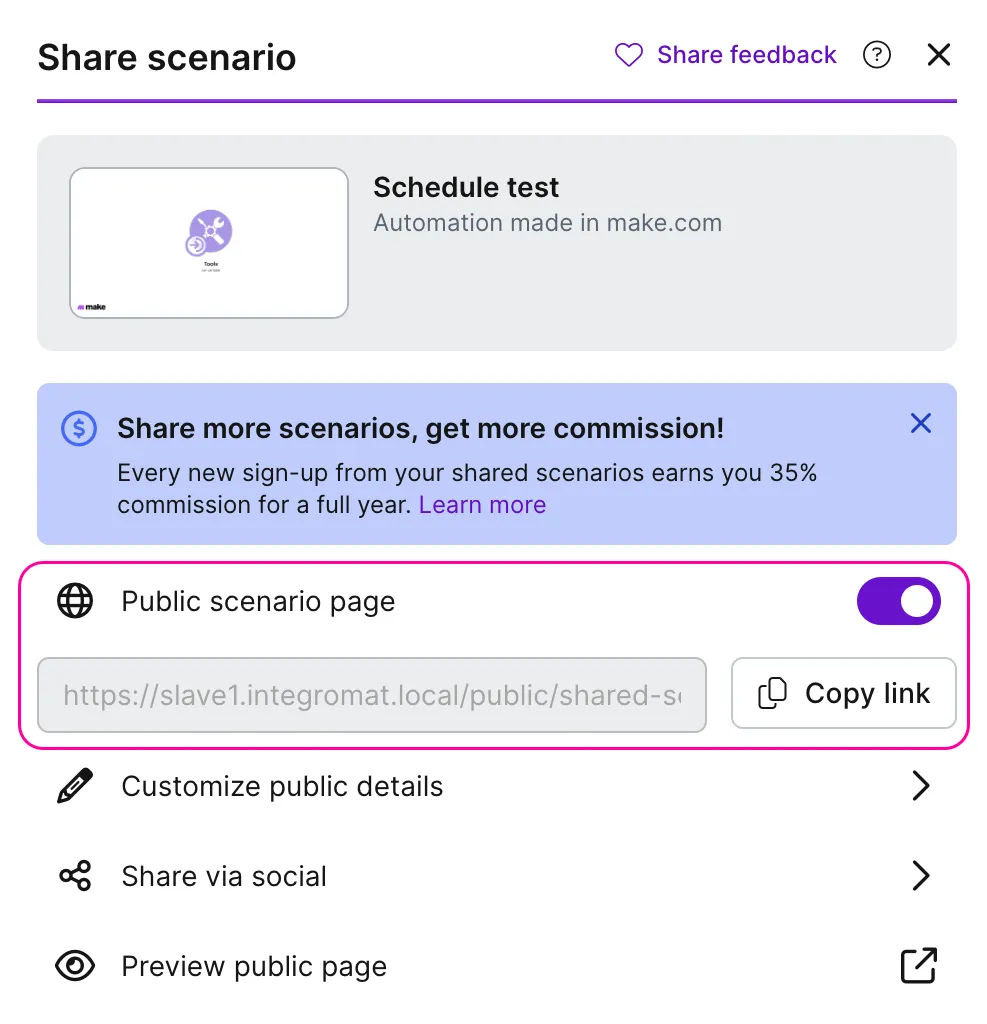
You can now copy the link and share it with anyone.
If you are an affiliate partner and organization owner, you can earn 35% commission for a full year for every new sign-up from your shared scenarios. Learn moreLearn more about our Affiliate program.
Customize public details
To configure how your scenario appears on the Public scenario page:
In the upper-right corner of the Scenario Builder, click Share.
In the Share scenario window, click Customize public details.

There you can:
Edit thumbnail
- Hover over the image and click Edit thumbnail.

- You will see the scenario. Use zoom and drag to set the part that should be displayed in the thumbnail.
- Click Save at the top of the screen to apply changes, or Cancel to revert to the default thumbnail.
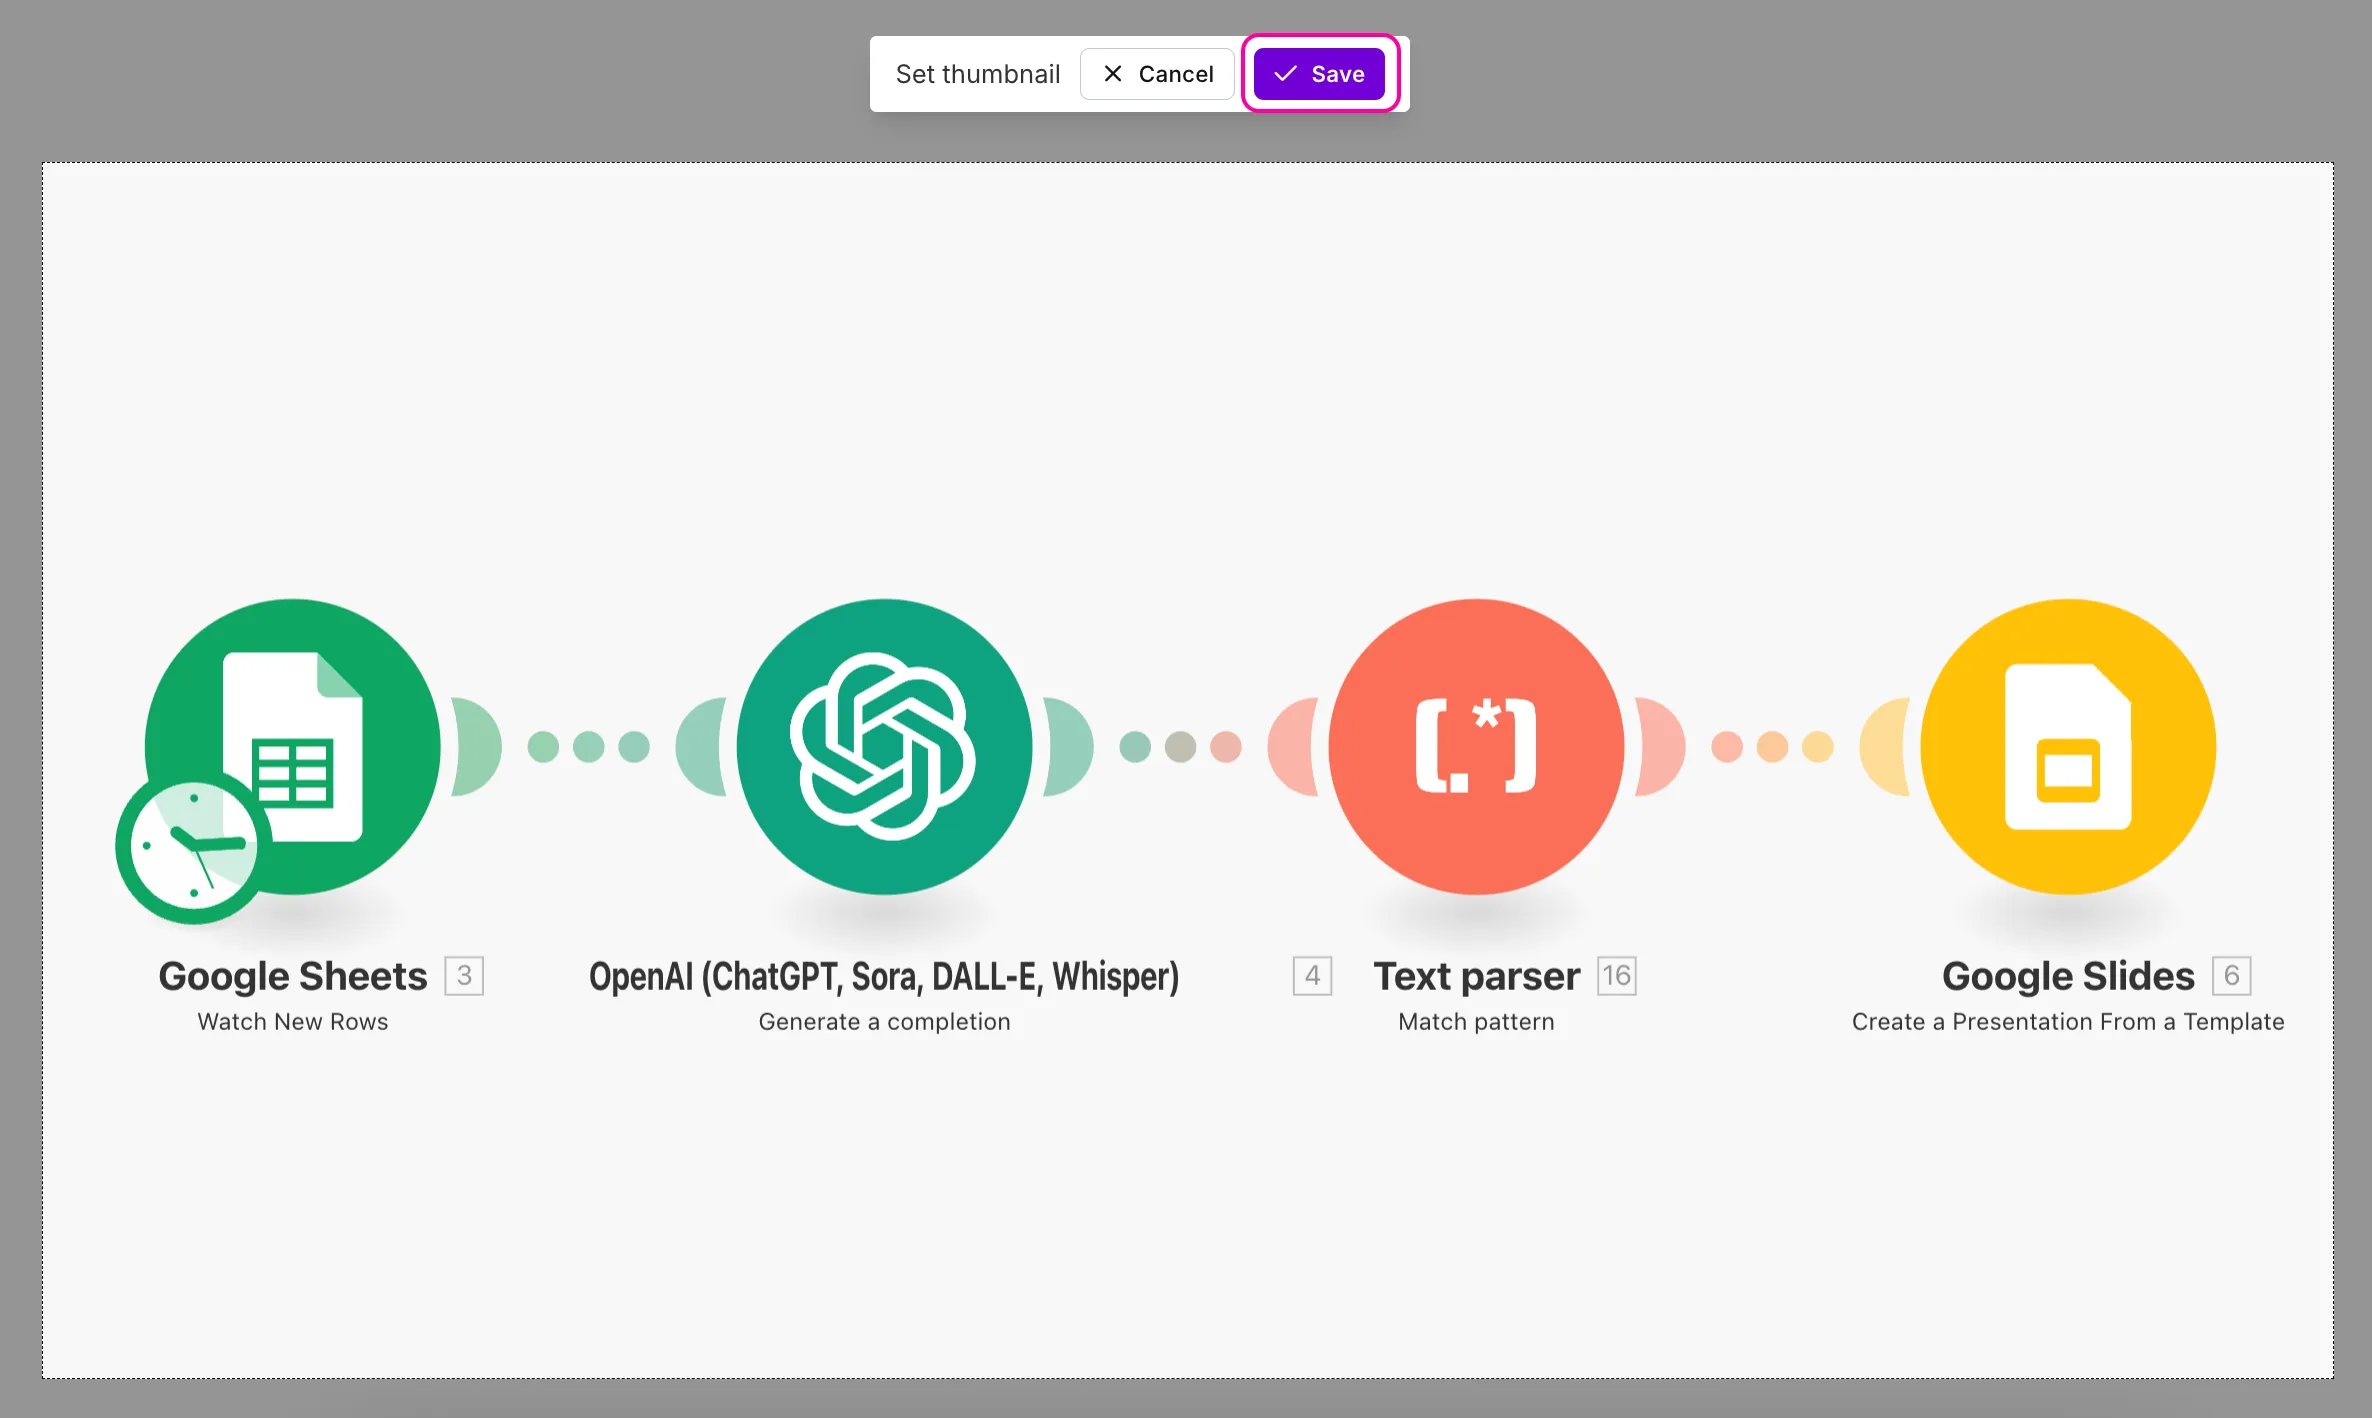
This thumbnail is attached to the link when it’s shared on social media.
The thumbnail is not automatically adjusted when you make changes to the shared scenario. To reflect the changes, go to the Share scenario window, click Customize public details, and update the thumbnail in the Edit thumbnail section.
Add title
- Enter a title (max. 40 characters) that will be displayed on the Public scenario page. It can differ from the scenario's name.

Add description
- Provide a brief explanation (max. 260 characters) of what the scenario does. This description will appear under the title on the Public scenario page.

Add additional information
- Include the details (max. 2000 characters) that viewers should know to make the scenario work, e.g., how to set up an app, configure modules, or establish connections. This will be displayed in the Additional information section on the Public scenario page.

Check author's details
Check the Author and avatar section that will be displayed on the Public scenario page. This section includes:
- Author’s name: this is the name of the Make user who last saved the scenario. Thus, it can differ from the person who initially created it. You can change how your name is displayed in the Profile settings of your Make account.
- Author's avatar: this is the picture set on gravatar.com for the author's email address used in the Make account. If you don't have a picture set or want to change the current one, you need to do it via gravatar.com.

When finished, click Save changes.
Share scenario via social media or email
You can also share scenarios directly on social media platforms or via email:
In the upper-right corner of the Scenario Builder, click Share.
In the Share scenario window, click Share via social.
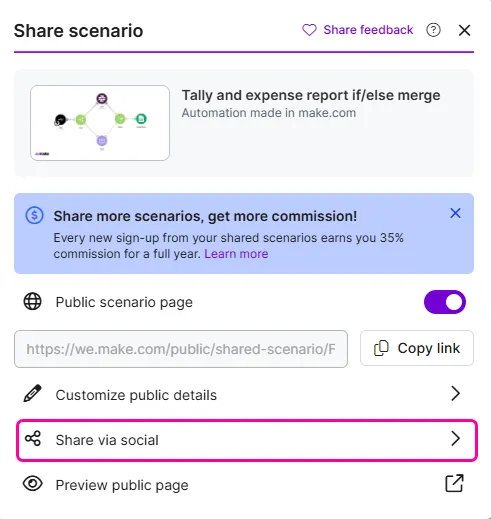
Click the required platform (email, LinkedIn, Facebook, or X).
You'll need to complete the authorization process for the selected social media platform. After that, you'll be redirected to the new post creation page or the new email draft page.
The post should have automatically attached a scenario preview, containing:
- Scenario thumbnail
- Scenario title (as specified by scenario metadata)
- Scenario description, if added.
If you are an affiliate partner and organization owner, you can earn 35% commission for a full year for every new sign-up from your shared scenarios. Learn moreLearn more about our Affiliate program.
Check sharing status
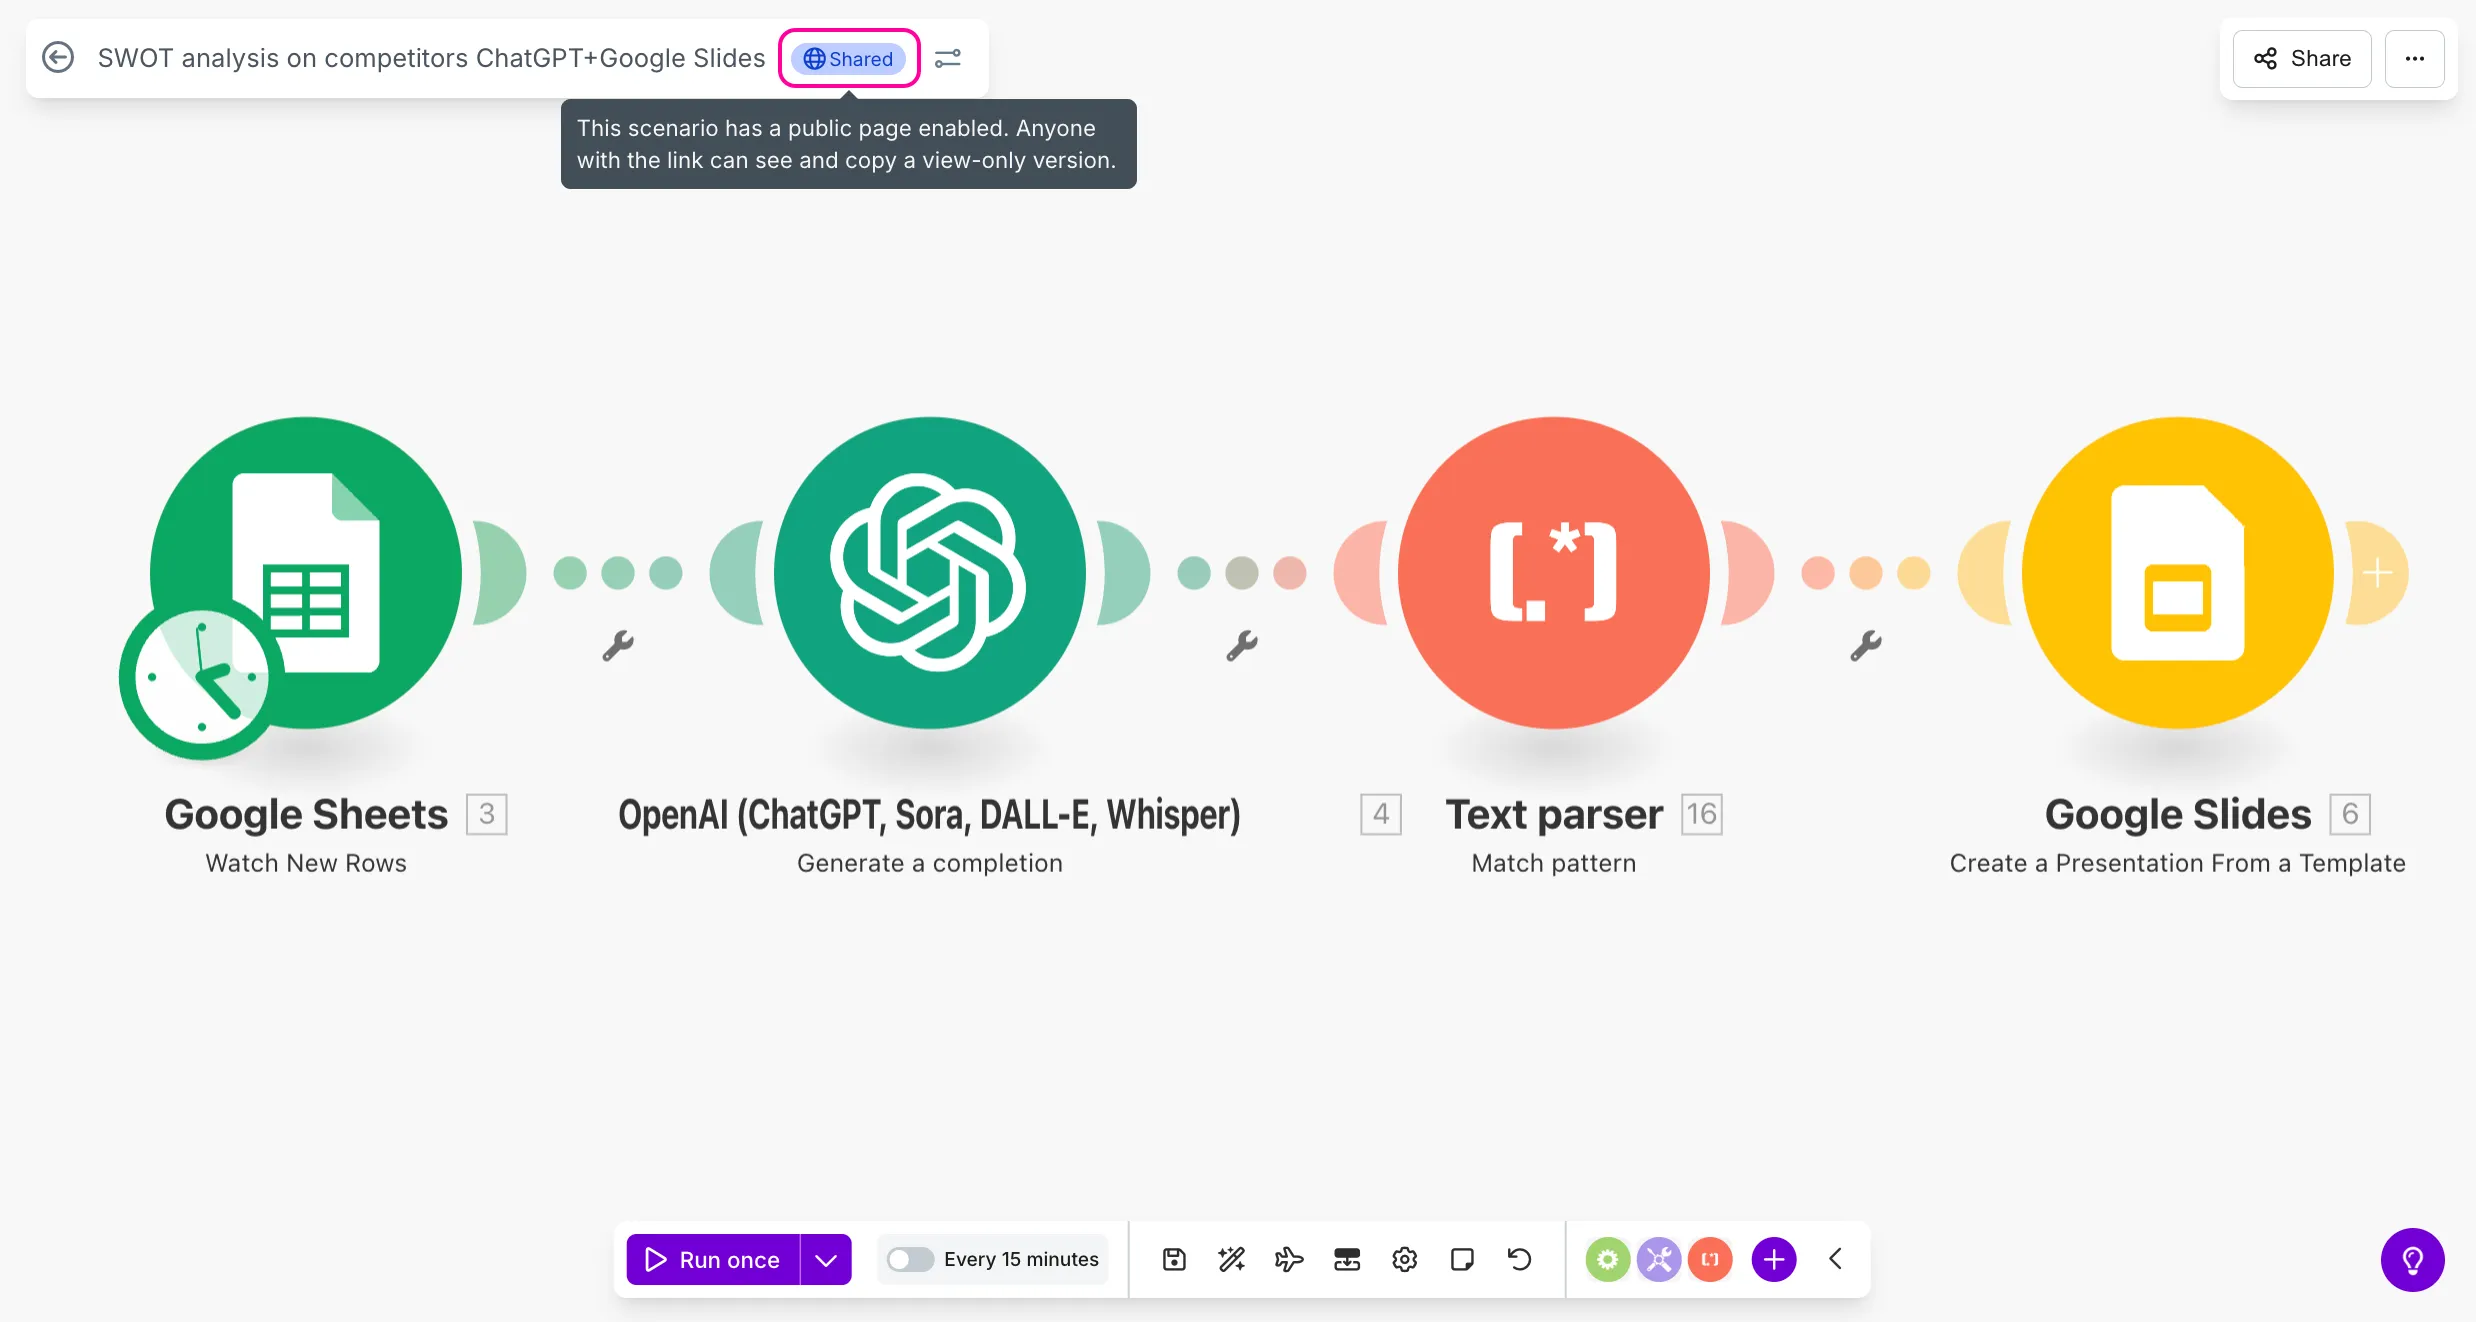
When a scenario is shared, you will see a blue Shared label next to the scenario name in the Scenario Builder or scenario diagram.
You can also see a blue Shared label next to the scenario name in the scenarios folder, if it's currently shared:

A shared link is dynamic. Viewers always see the latest saved version of the scenario.
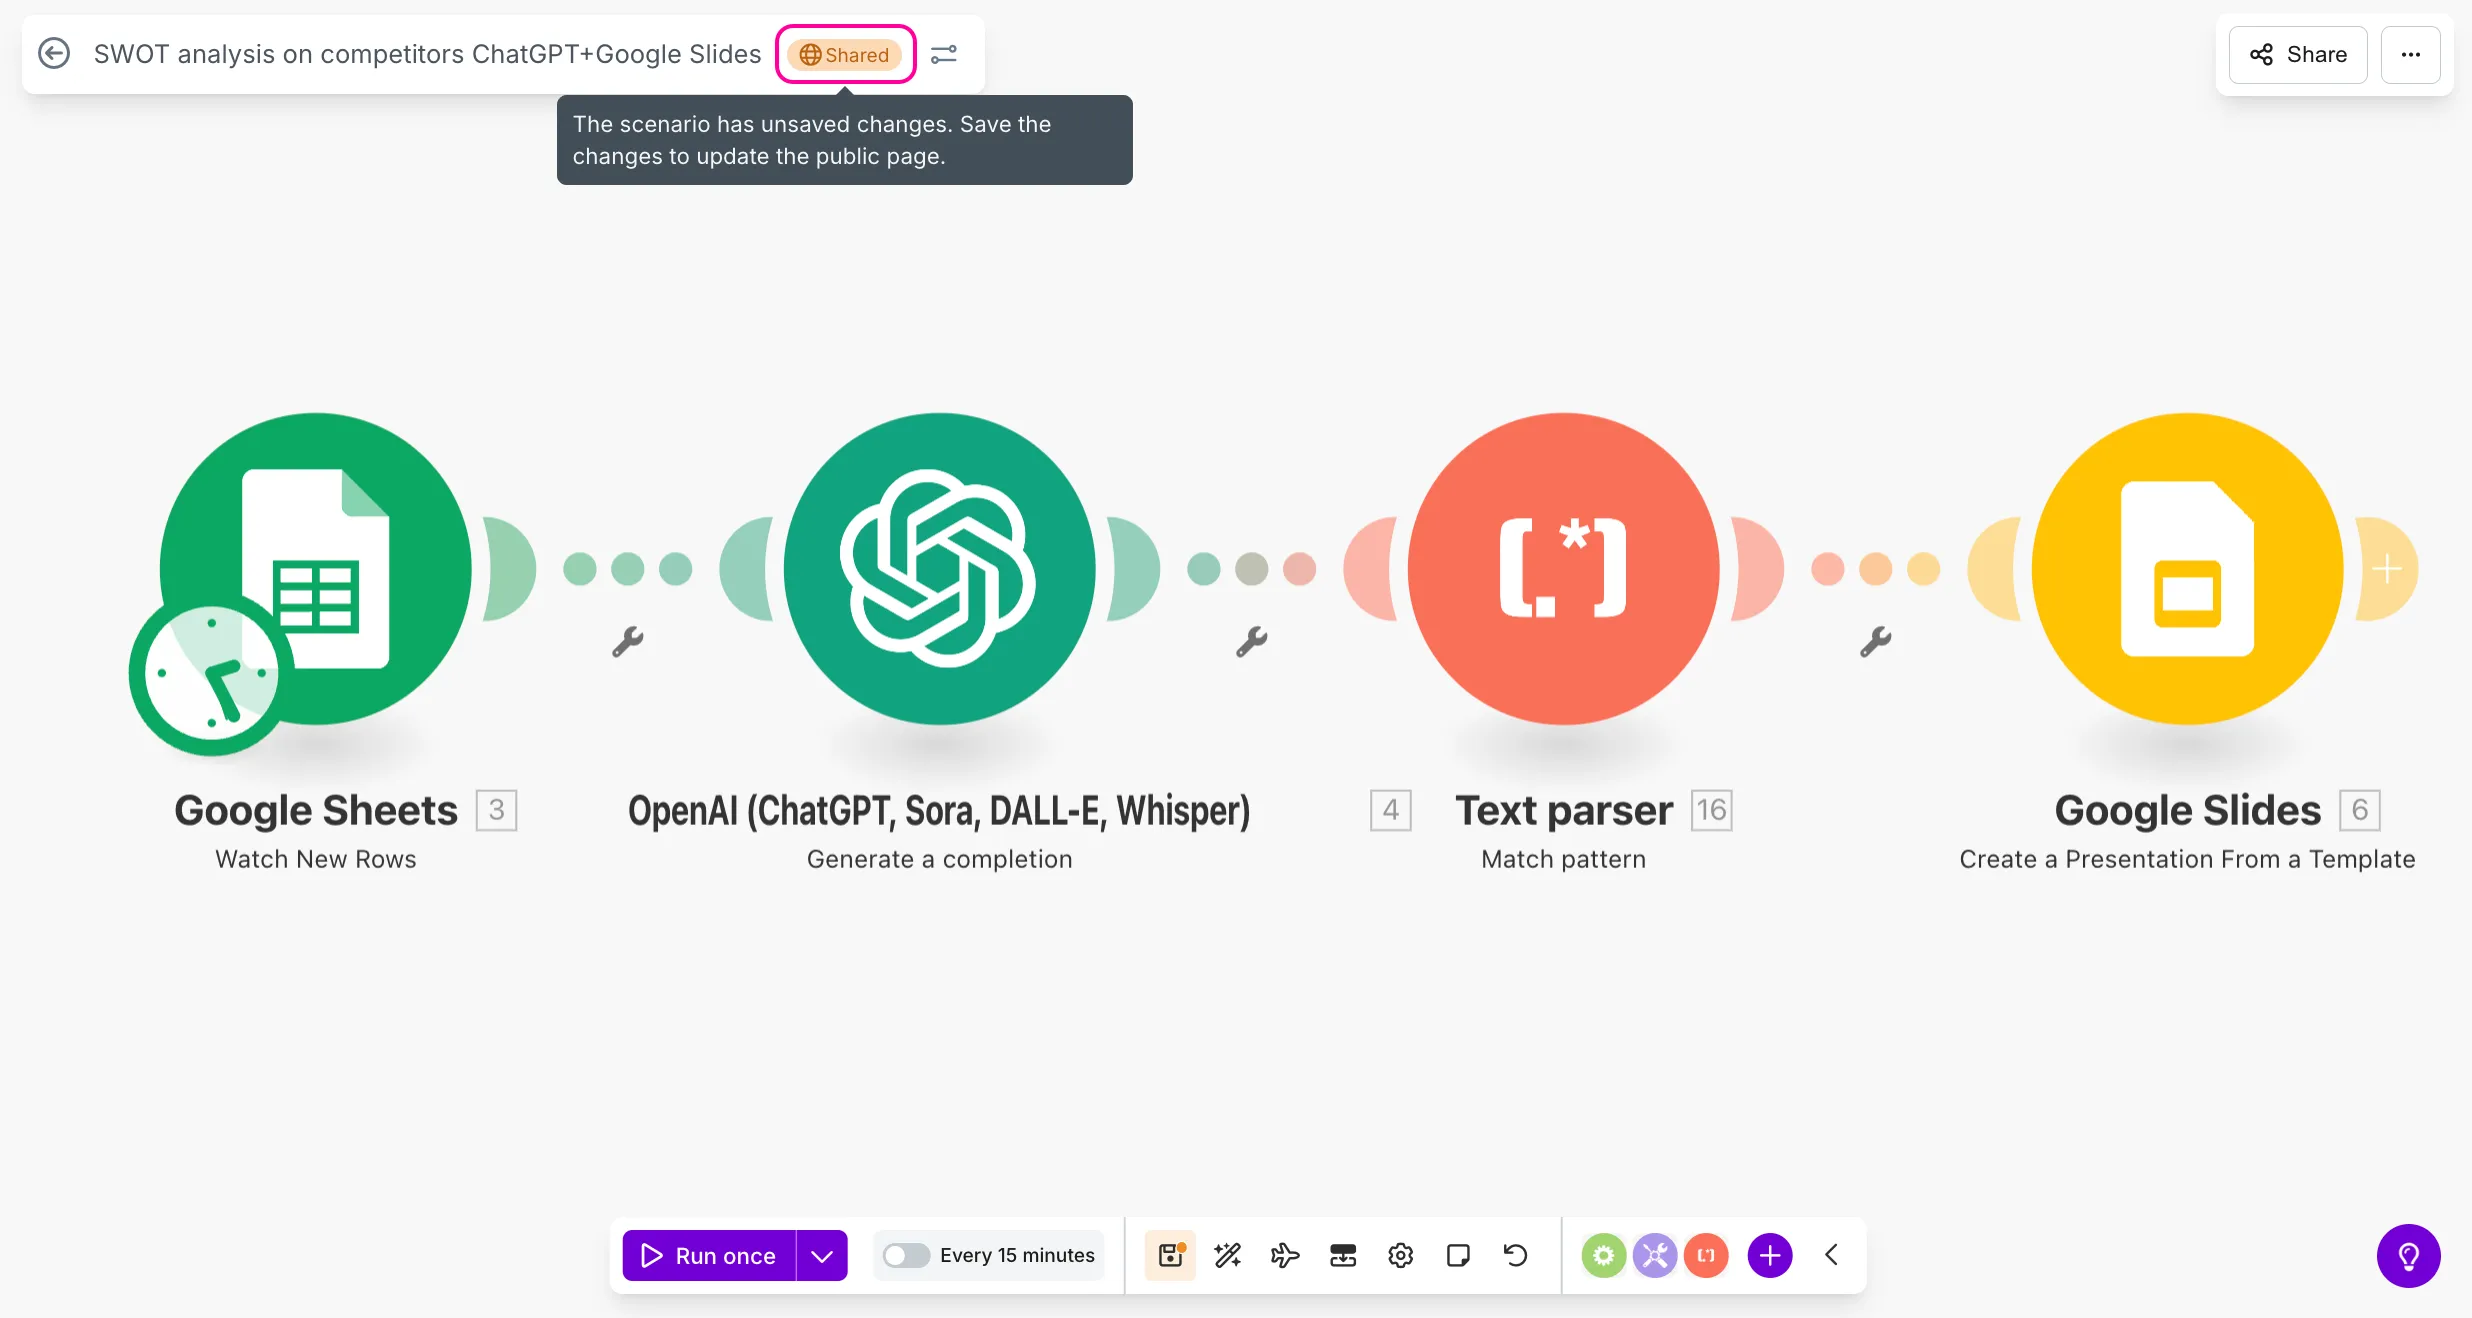
You must save changes for them to appear in the shared scenario. Unsaved changes are indicated by an orange Shared label next to the scenario name.
Preview public scenario page
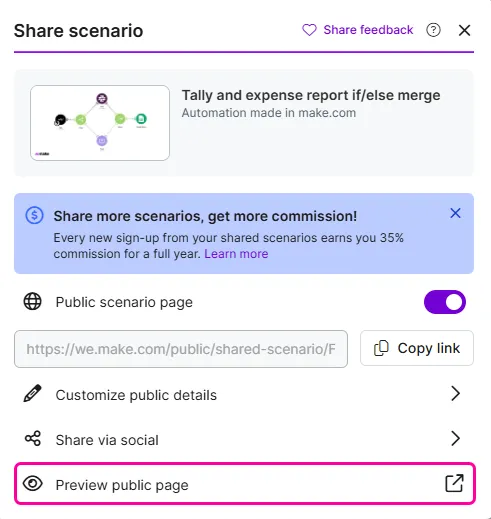
To preview the Public scenario page:
In the upper-right corner of the Scenario Builder, click Share.
In the Share scenario window, click Preview public page.
You can now preview the public page.
If you are an affiliate partner and organization owner, you can earn 35% commission for a full year for every new sign-up from your shared scenarios. Learn moreLearn more about our Affiliate program.
Disable scenario sharing
To stop sharing the scenario:
In the upper-right corner of the Scenario Builder or scenario diagram, click Share.
Switch off the Public scenario page toggle.
The link will no longer work. Anyone who accessed the scenario while the public page link was enabled will still keep their copy.
If you enable scenario sharing again, the link will remain the same. Anyone who had access to the previously shared public page will be able to see the most up-to-date version again.
Public scenario page
Users who get the link or see a scenario shared on social media can click it and see the Public scenario page. This is a view-only, shareable page that includes:
- Title
- Description
- Interactive scenario preview
- Additional information
- Author’s name and avatar
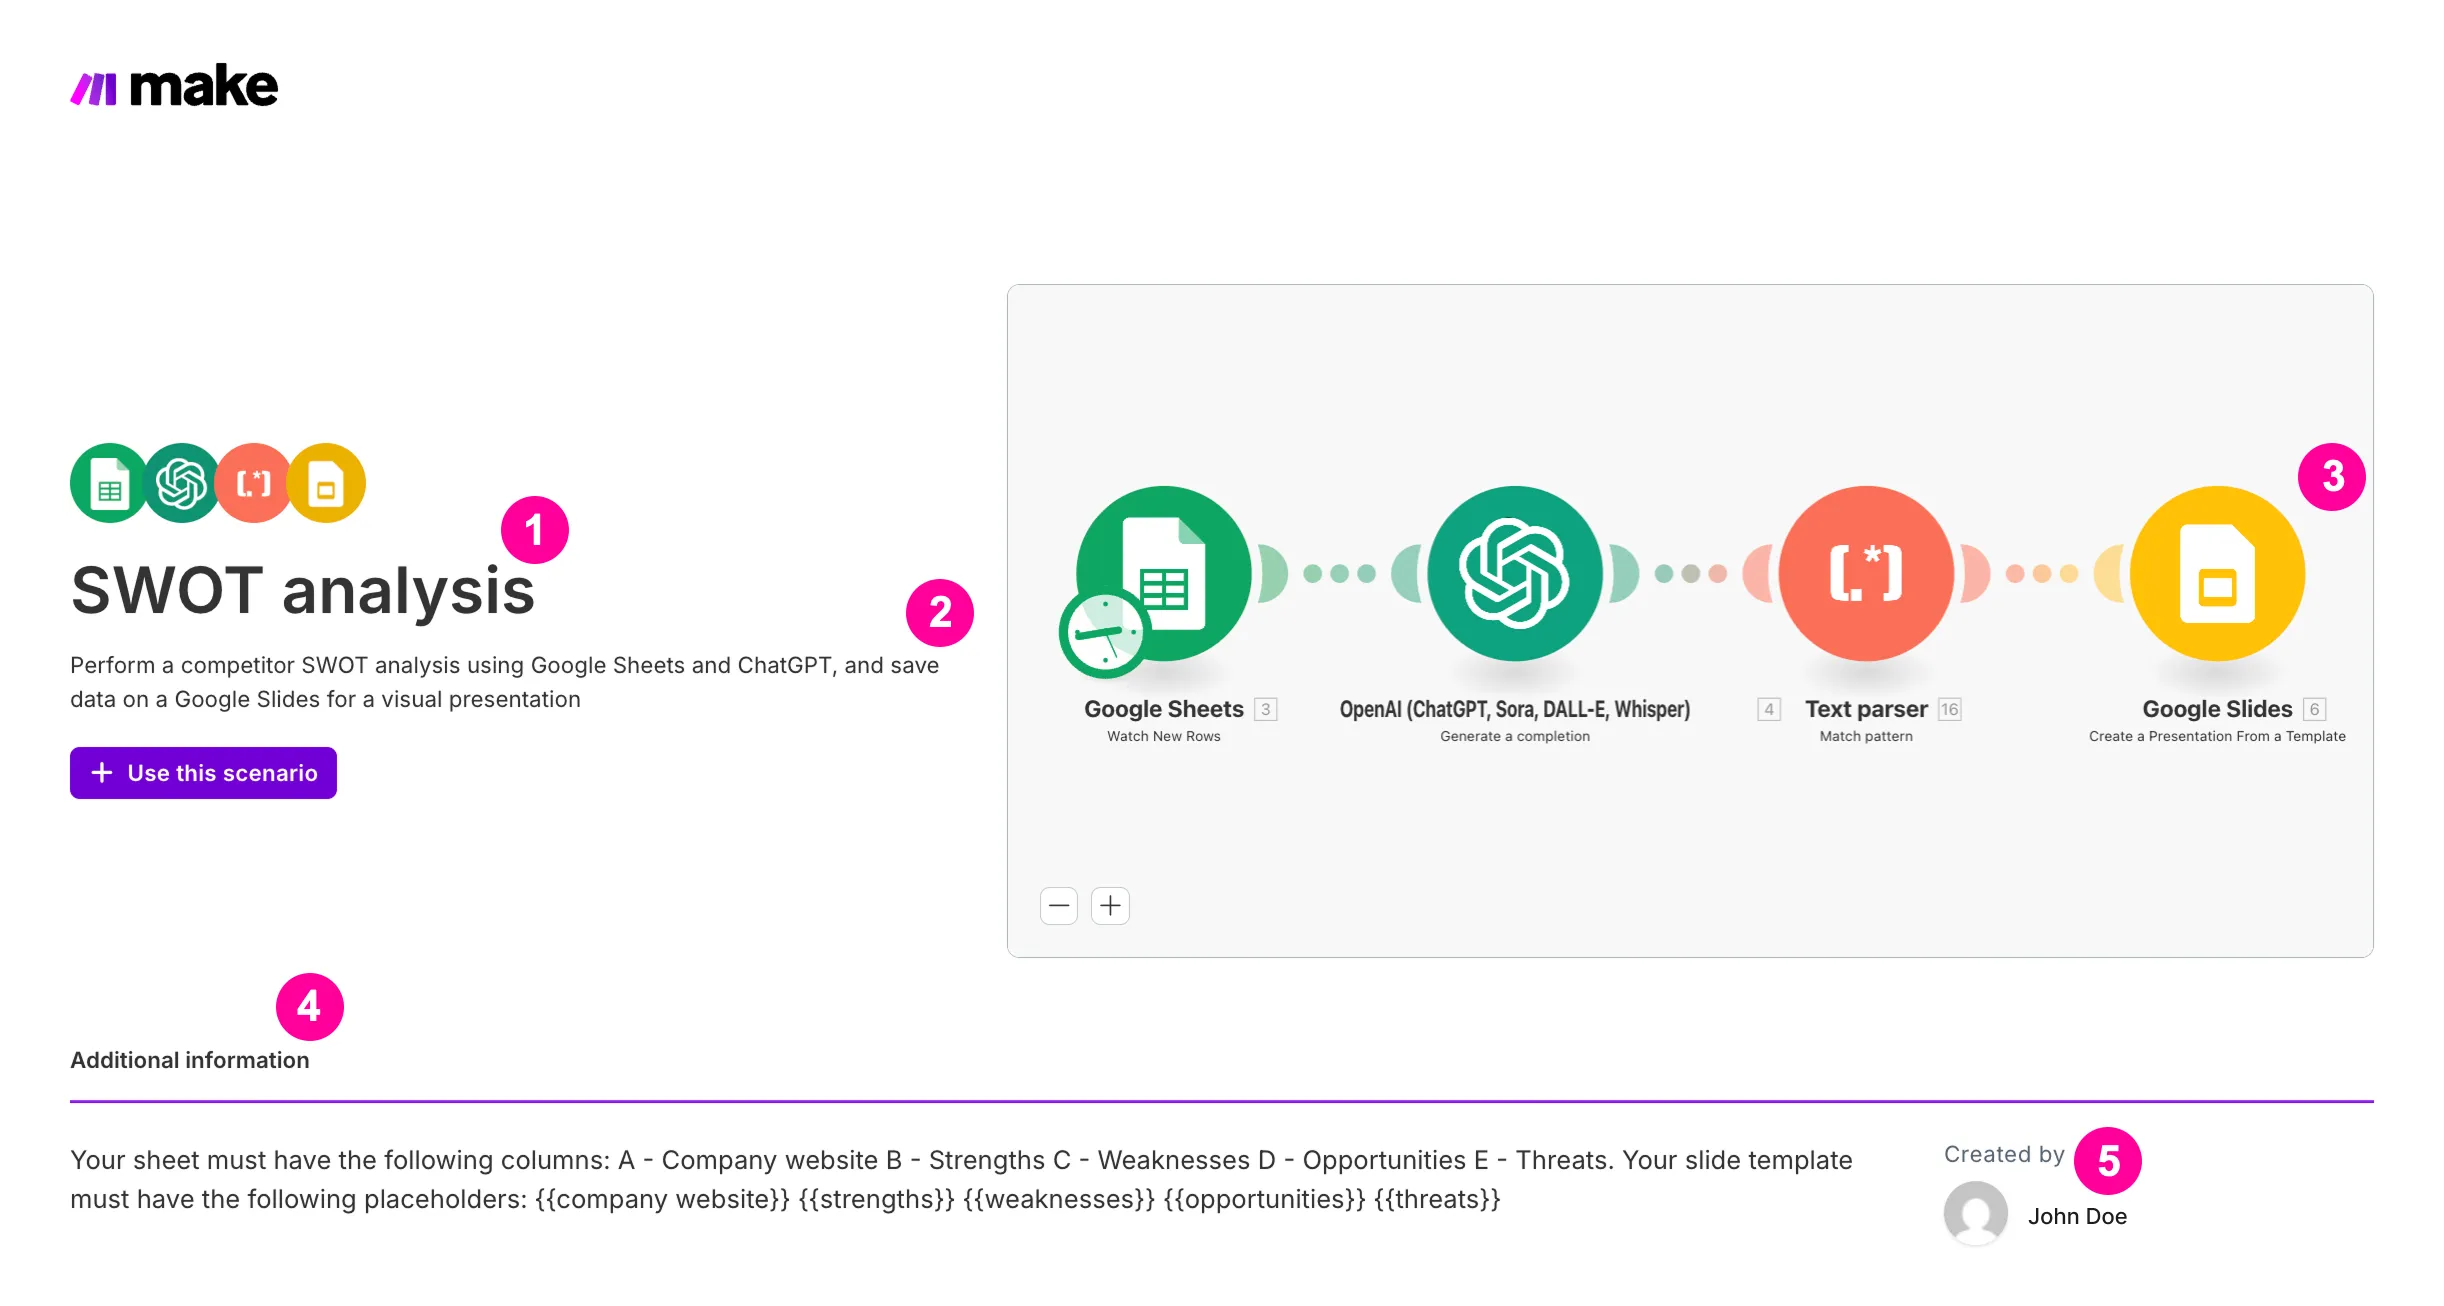
As a viewer, you can click the +Use the scenario button on that page:
- If you are logged in to Make, a copy of the scenario will be created in your account.
- If you are not logged in to Make, you will be prompted to sign in. After signing in, a copy of that scenario will be created in your account.
If you have multiple Organizations and/or Teams in your Make account, the scenario will be added to the last Organization > Team you've opened (or which is currently selected).
What is included in a scenario shared via a link
- Modules
- Module settings (with mapped values, but without connections)
- Metadata
- Scenario notes
What is not included in a scenario shared via a link
- API keys, passwords, and other details used to create a connection
Subscenarios, Make AI Agents, Data stores, and Data structures are shared as empty modules.
Custom and Community apps may not be displayed in a shared scenario if they haven't been approved and made installable by the users’ organization.
If the shared scenario includes apps that require installation, users without admin permissions in their organization will see a warning prompting them to contact their organization’s admin to proceed.
If your scenario includes subscenarios, Make AI Agents, Data stores, Data structures, and Custom or Community apps, you’ll see a warning before sharing. Click Continue sharing to share the scenario as it is.

Those who copy and use a shared scenario have to:
- Create their own connections and provide credentials for all the apps in the scenario.
- If the scenario includes subscenarios, ask a creator to share them separately, or create them manually, and connect afterward.
- Create their own AI agents.
- Recreate the data stores and data structures manually.
- Install custom and community apps themselves.
As a scenario creator, you can use the Additional information field to explain how to handle elements that aren’t shared with the scenario.
You can also add scenario notes when preparing a scenario for sharing to help users quickly tailor the scenario to their use case.