Webhook-triggered AI agent
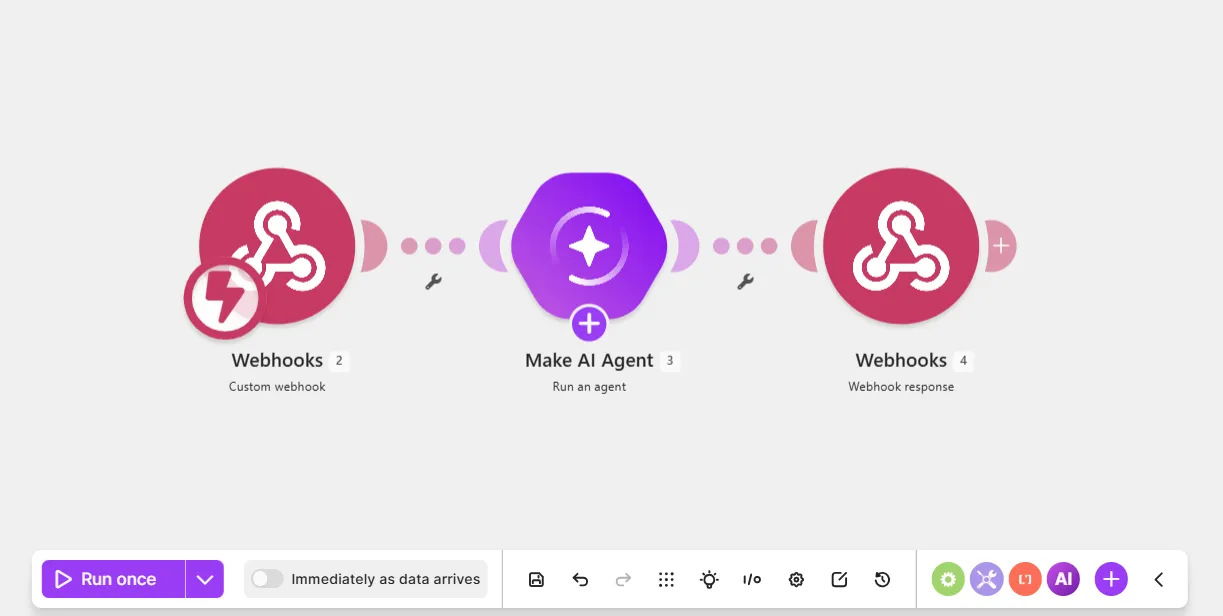
This webhook-triggered AI agent scenario watches for new data sent to a webhook and the agent sends a reply back to the webhook. It is ideal for sending data from third-party services to Make.
Prerequisites
- A Postman account
Step 1. Add a Custom webhook
The Webhooks > Custom webhook module allows the agent to automatically receive new data from any third-party service.
To add the Custom Webhook module:
In the Scenario Builder, click the giant plus.
In the app search, search for and click Webhooks.
Click the Custom webhook module.
In Webhook, click Add to create a new one.
In the Create a webhook dialog, in Webhook name, name your webhook to identify it later.
Optionally, in API keys, create an API key that consists of characters of your choice for additional security.
Copy the webhook URL to your clipboard.
You've now added a Webhooks > Custom webhook module to your scenario.
Step 2. Test the webhook in Postman
To check that your webhook works, send a sample request to it from Postman. This action mimics a real request from a third-party service.
To send the request in Postman:
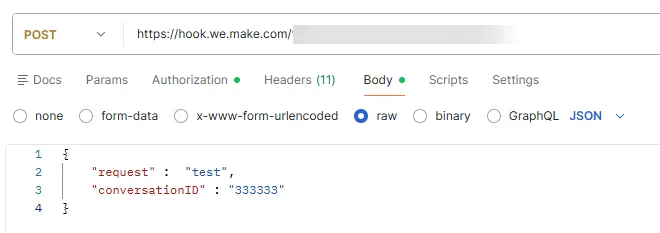
Paste your webhook URL and select POST.
In Body, add the following configuration:
{
    "request" :  "test",
    "conversationID" : "333333"
}
In Authorization, if you have an API key:
- In Key, enter x-make-apikey.
- In Value, enter your APi key.
Click Send to send the request to the webhook.
Go back to your webhook scenario to check if you have a Successfully determined status below the webhook URL. This means that the webhook works.
Click Save.
You've now tested your webhook URL in Postman.
Step 3. Add a Run an agent module
To add a Make AI Agent (New) > Run an agent module:
In the Scenario Builder, click the plus icon next to the Webhooks > Custom webhook module.
In the app search, search for and click Make AI Agent (New).
Click the Run an agent module.
In Connection, select an existing AI provider connection or click Add to create a new one.
If you don't want to set up an account with an AI provider, select Make's AI Provider.
In Model, select a model from your chosen AI provider.
In Instructions, describe who the agent is and what it does. For example, "You are a helpful agent who answers questions."
In Input, map the request value from the Webhooks > Custom webhook module.
In Conversation ID, map the conversationID value from the Webhooks > Custom webhook module.
The agent uses this ID to remember previous exchanges in the conversation and provide contextual responses when the user asks follow-up questions. The agent treats each new value as a new conversation.
In Postman, you set a random Conversation ID value.
Click Save.
Click Save on the Scenario toolbar.
You've now added a Make AI Agent (New) > Run an agent module to your scenario.
Step 4. Add a Webhook response module
The Webhooks > Webhook response module allows the agent to reply to the webhook request.
To add the Webhooks > Webhook response module:
In the Scenario Builder, click the plus icon next to the Make AI Agent (New) > Run an agent module.
In the app search, click Webhooks.
Click Webhook response.
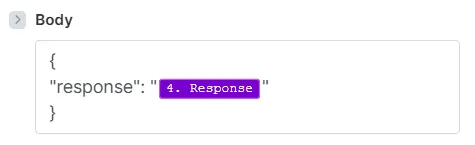
In Body, enter a simple JSON response:
{
"response": "<Response>"
}To replace the <Response> placeholder, map the Response value from the Make AI Agent (New) > Run an agent module.
Toggle Advanced settings.
In Custom headers, click Add item to define the type of data returned:
- In Key, enter content-type.
- In Value, enter application/json.
Click Save.
Click Save on the Scenario toolbar.
Toggle Immediately as data arrives to activate the scenario, so it's ready to receive incoming data as soon as it comes.
Click Save.
You've now built a webhook-triggered scenario, so any third-party service can send data to the webhook and pass it into the agent.