Manage AI agents
This page reflects a previous version of Make AI Agents. For the latest information, see Make AI Agent (New).
To create and manage AI agents in Make, navigate to the AI Agents configuration tab in the left sidebar.

In the AI Agents configuration tab, you can:
- View the existing AI agents available in your team
- Create and duplicate agents
- Configure agents
- Delete agents
AI agents are shared across all team members, like connections. If you'd like to have a private agent, use a team where you're the only member.
Create agents
To create a new AI agent, navigate to the AI Agents configuration tab, then click the Create agent button in the top-right corner:
In the Connection dropdown, select an existing connection, or click Add to open a Create a connection dialog:
- In the Connection type dropdown, select your AI provider.
- If applicable, fill in the rest of the form according to the documentation for creating a connection to the AI provider. Check the list of AI service providers.
- Click Save to complete the connection.
Users on all plans can select Make's AI Provider as a connection type. Those on paid plans can also choose a custom AI provider connection, such as OpenAI or Anthropic Claude.
In the Agent name field, specify a name for the agent.
In the Model field, select the AI model that the agent will use for reasoning.
In the System prompt field, define the agent's purpose and constraints.
A concise system prompt is recommended. You can later tailor the agent's behavior to a specific task in the Make AI Agents app.
Click Save to confirm agent settings.
Next, add the agent's tools and context:
In Context, click Add to upload files that the agent can use, then Upload.
Context allows you to add external information that enhances the agent's knowledge base. Examples include internal knowledge bases or reference tables. Context files are stored in a RAG vector database to enable long-term memory.
Current limitations for uploading in Context:
- TXT, PDF, DOCX, CSV, MD, and JSON files only
- 20 MB maximum per file
- 20 files maximum per AI agent
- 150 files per team and 200 files per organization (Teams plan)
- 250 files per team and 500 files per organization (Enterprise plan)
- 100 files per team and 150 files per organization (all other plans)
In MCP, you can connect your agent to MCP servers to access additional tools.
Click Add to create a connection to an available MCP server, then toggle on the tools that you want the agent to access. Click Save.
In Tools, click Add to select the module(s) or scenarios the agent can use.
Click Save.
You have created an AI agent. You can now use it in a Make AI Agents > Run an agent module, or you can continue configuring it.
Duplicate agents
If you need to create a new agent based on an existing agent, you can duplicate an agent for a quicker setup.
To duplicate an agent:
Navigate to the AI agents configuration tab in the left sidebar.
Identify the existing agent to duplicate.
Click the three dots next to the Configure button.
Select Duplicate.
In the Duplicate agent dialog, configure your new agent's connection, name, model, and system prompt.
Click Duplicate.
You have now duplicated an agent. To further configure this agent, click the Configure button.
Configure agents
When using AI agents, you will need to adapt them to your processes or update them to improve their efficiency.
Options for configuring your agent:
- Update the agent's system prompt in System prompt
- Add background information or data for the agent to use in Context
- Add modules or scenarios the agent can use as its tools in Tools
The tools you select in the agent's settings are always available to the agent, in addition to tools that you add in the Make AI Agents > Run an agent module.
To configure an agent:
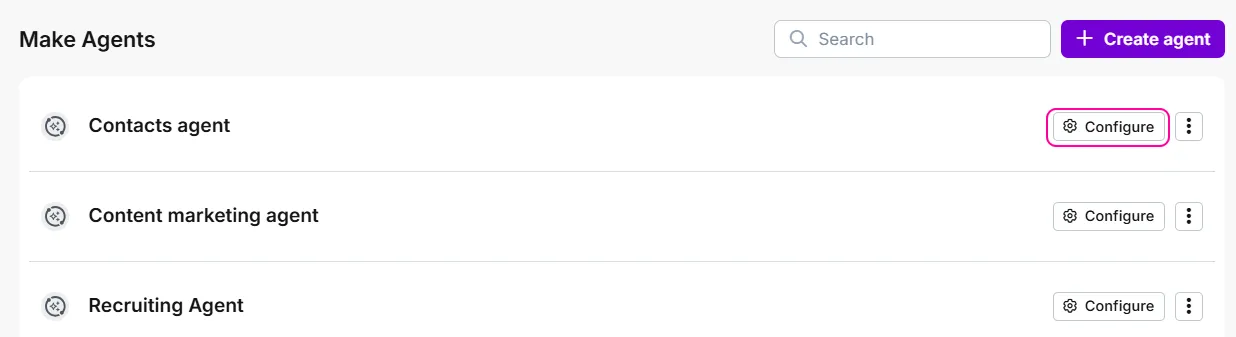
Navigate to the AI Agents configuration tab in the left sidebar, then click Configure.
Alternatively, you can click the Configuration link in the Make AI Agents > Run an agent module settings:

To make further changes to the agent's model, click the Agent settings button within an agent in the AI Agents configuration tab.
This allows you to:
- Change the name of the agent
- Change the model the agent is using if the AI provider has different models
- If the model supports Model Configuration, you can configure the following:
- Maximum tokens: The maximum amount of tokens that the agent can generate and send back to the Make AI Agents > Run an agent module.
- Maximum steps: The maximum number of iterations the agent can run before providing the final reply to your request.
- Maximum history: The maximum number of messages that the agent adds to its context from the communication thread. This setting influences the agent's context only if you specify the Thread ID in the Make AI Agents > Run an agent module settings.
Updating agent settings affects all Run an agent modules using the agent. To revert changes, you must do so manually.
You can't change an agent's AI provider. To use a different provider, you must create a new agent.
Delete agents
To delete an agent:
Navigate to the AI Agents configuration tab on the left sidebar.
Click the button with the three dots next to the agent to delete.
Select Delete.
AI agent deletion is permanent. If you delete an AI agent, all modules using the agent will stop working.